Agenda module — Complete guide
Everything you need to publish events, manage registrations and waitlists, set recurrence, share a public calendar, and promote your events.
10 sections
On this page
1 Overview
The Agenda module lets your church publish events — services, meetings, conferences, online or on-site — and let people discover and register for them. Each event can carry a cover image, a description in several languages, a location or an online link, a capacity with a waitlist, and an optional recurrence.
Once published, events appear on your public church page, in the platform-wide events directory, and in a subscribable calendar (ICS / WebCal). You can also boost an event with a paid promotion and follow its performance in the analytics.
In short: create an event → fill the details and date → choose capacity, recurrence and visibility → set the status to Published → manage registrations and track results.
2 Before you begin
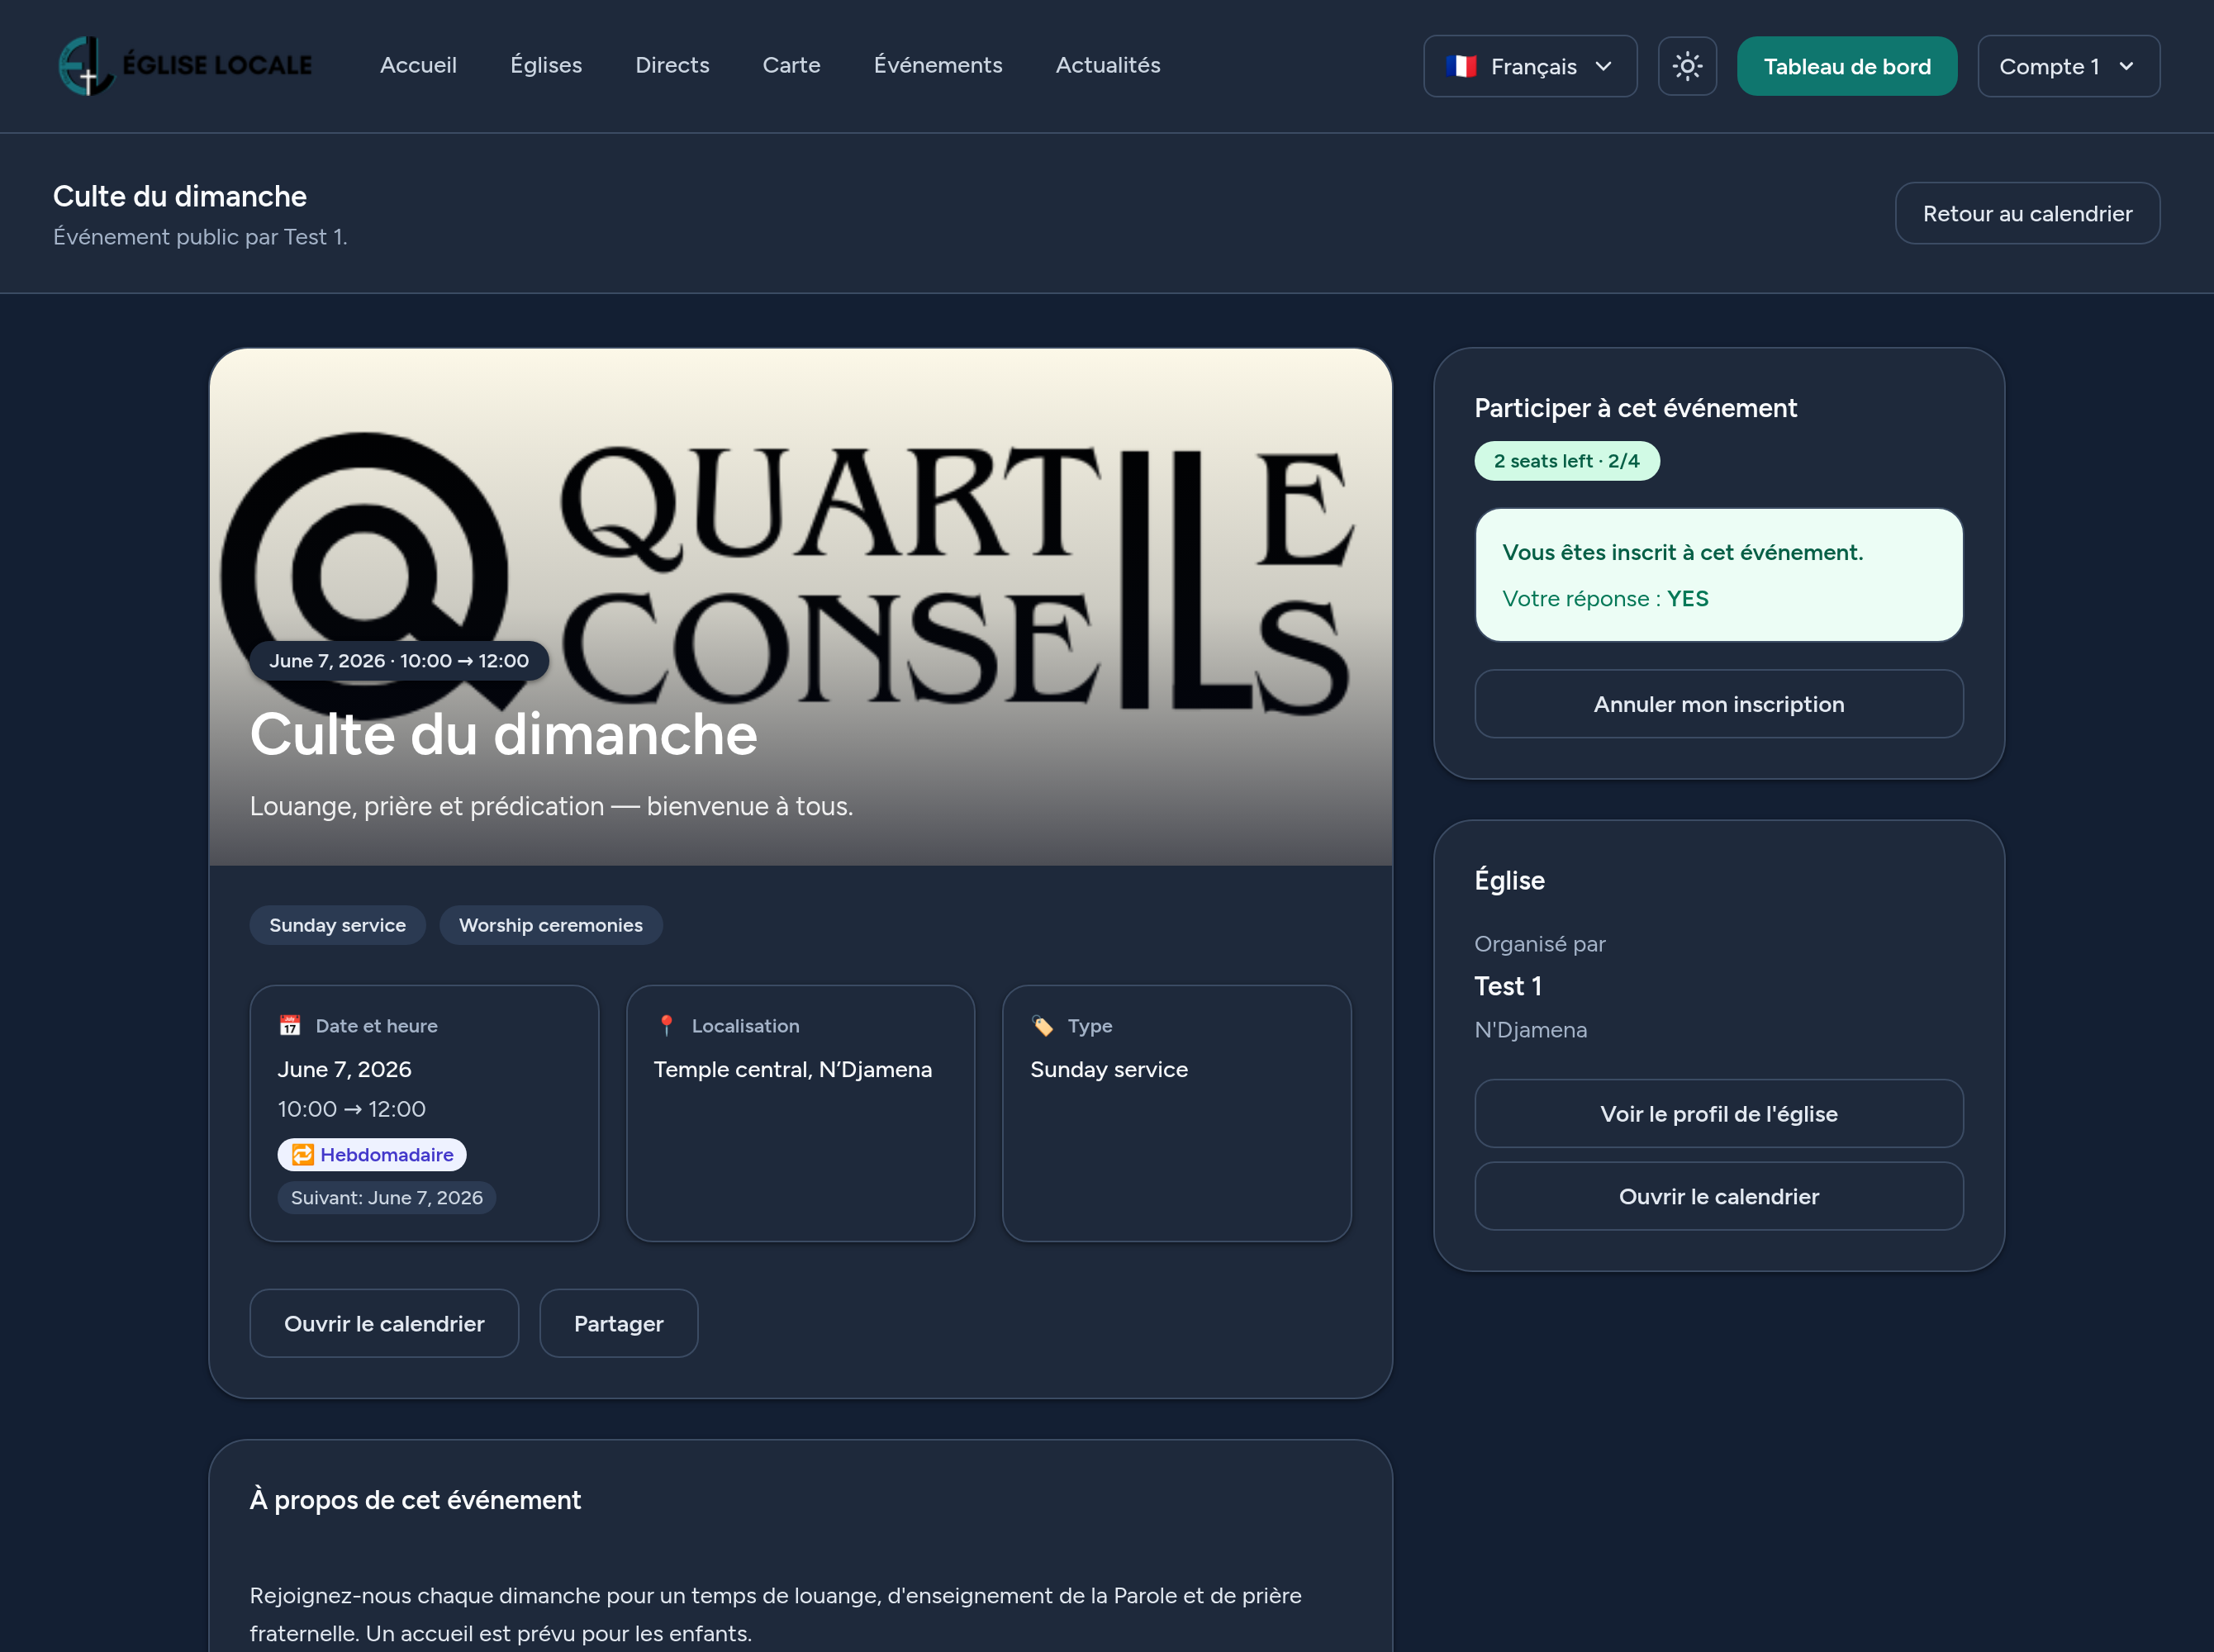
- Where to find it: open your Dashboard and go to Agenda. From there you can list, create and manage your events.
- Permissions: church owners, managers and editors can create and edit events.
- Time zone: all dates and times are entered and shown in your church's configured time zone — the form reminds you which one is in use.
- Languages: each event's title, teaser, description and location can be translated; the default language is required.
3 Step 1 — Create an event
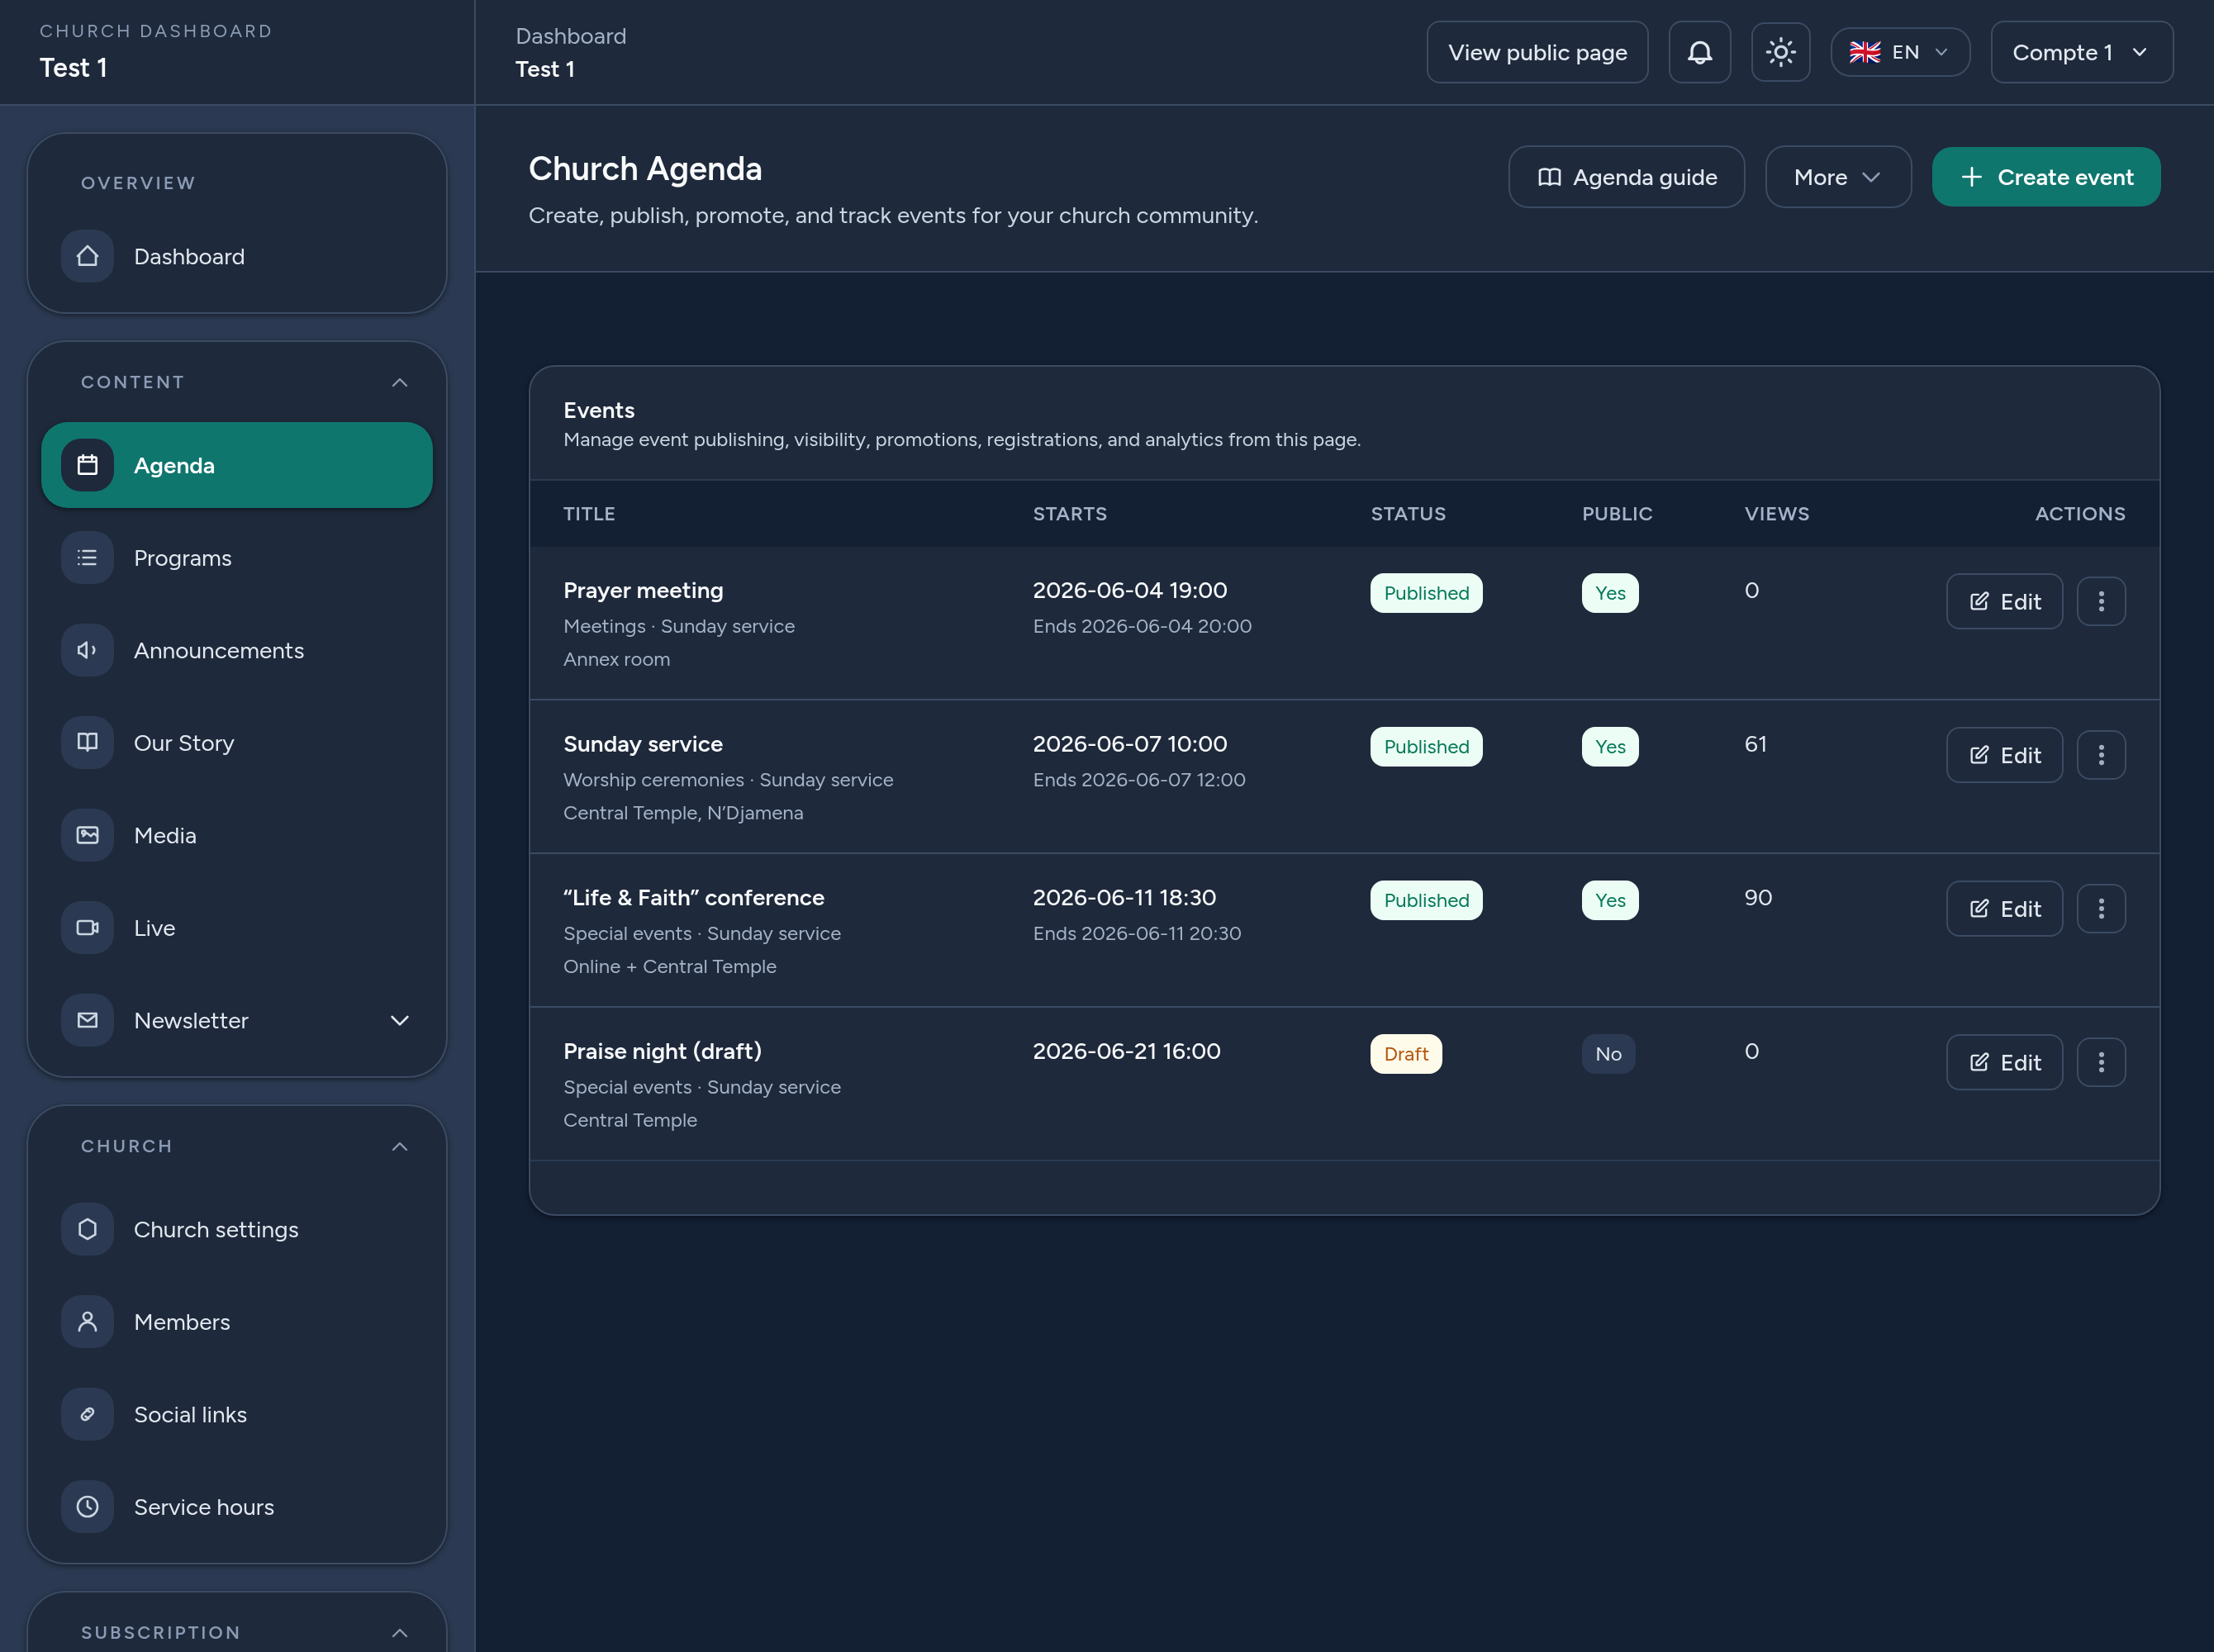
Click New event and fill the form:
- Category & type — classify the event (e.g. worship, meeting) and its format (on-site, online, hybrid).
- Title, teaser, description, location (per language) — use the language tabs. The teaser is the short text shown on cards; the description is the full text on the event page. Use “Copy from <default>” to prefill a translation.
- Featured image — a cover shown on the event page and cards.
- Online URL — for online/hybrid events (Zoom, Google Meet, YouTube/Facebook Live…).
- Capacity — optional; leave empty for unlimited. When full, new sign-ups join a waitlist.
- Date & time — start (required) and optional end, in your church's time zone.
- Status — Draft (hidden), Published (visible publicly), or Archived.
- Public — tick to show the event on your public calendar and the platform directory.
4 Step 2 — Recurrence
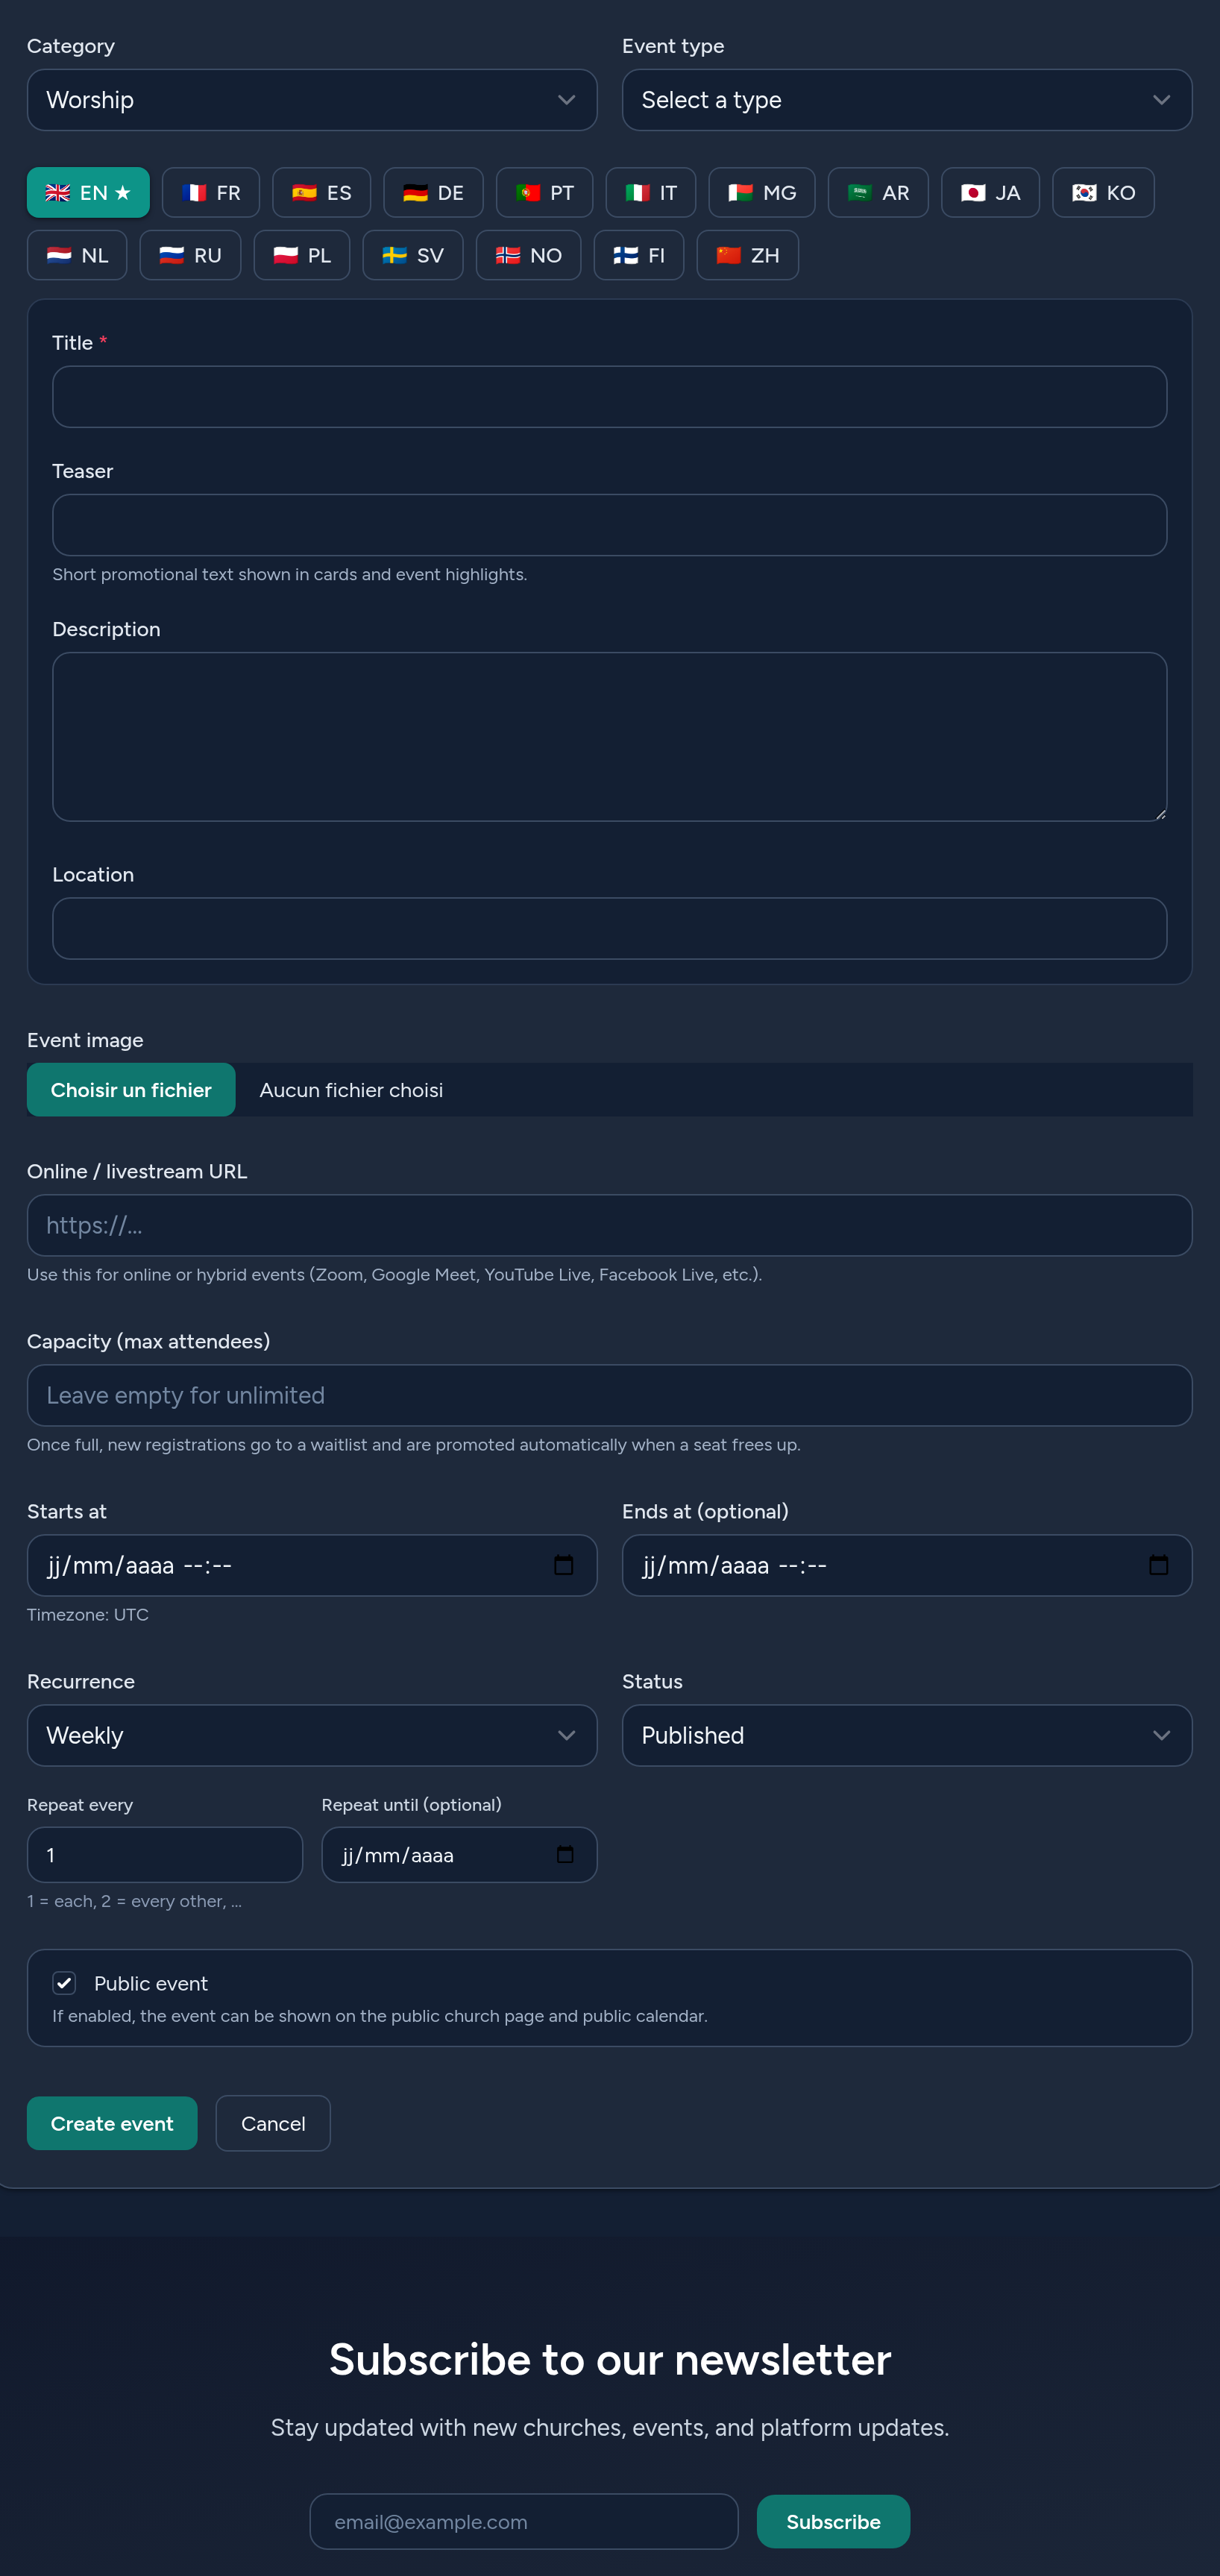
If the event repeats, set a Recurrence instead of recreating it:
- Frequency — Daily, Weekly, Monthly or Yearly.
- Repeat every N — the interval (e.g. 2 = every other week).
- Repeat until — an optional end date.
The event is stored once; upcoming occurrences are computed automatically. Recurring events keep showing publicly as long as they still recur, the event page displays the next occurrence, and the calendar export (ICS) carries the recurrence rule so it repeats in the visitor's calendar too.
5 Step 3 — Registrations & waitlist
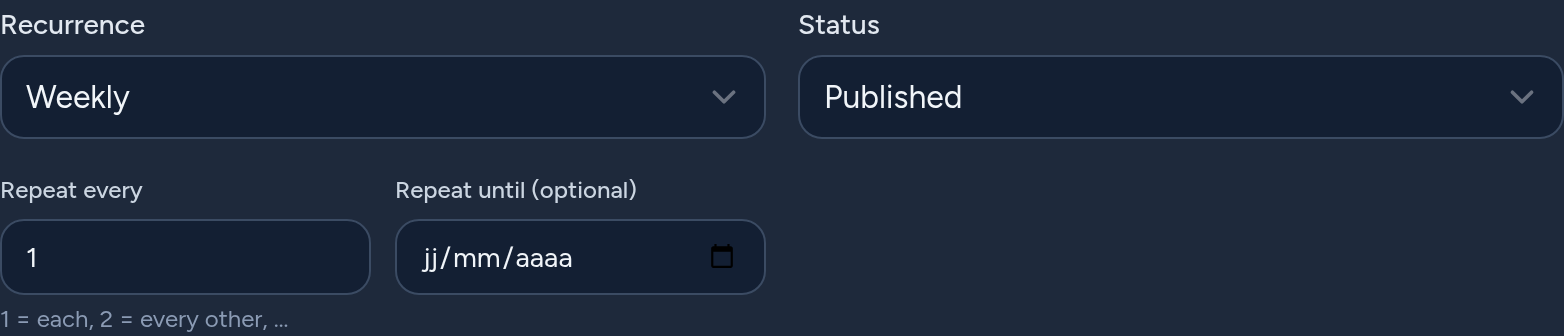
Visitors who are logged in can register for an event from its public page, and optionally answer an RSVP (yes / maybe / no).
- Capacity — when the confirmed count reaches the capacity, further registrations are placed on a waitlist (first-in, first-out).
- Auto-promotion — if a confirmed attendee cancels, the first person on the waitlist is promoted automatically.
- No capacity — registrations are unlimited.
Each person can register only once per event, and can cancel at any time.
6 Step 4 — Managing registrations
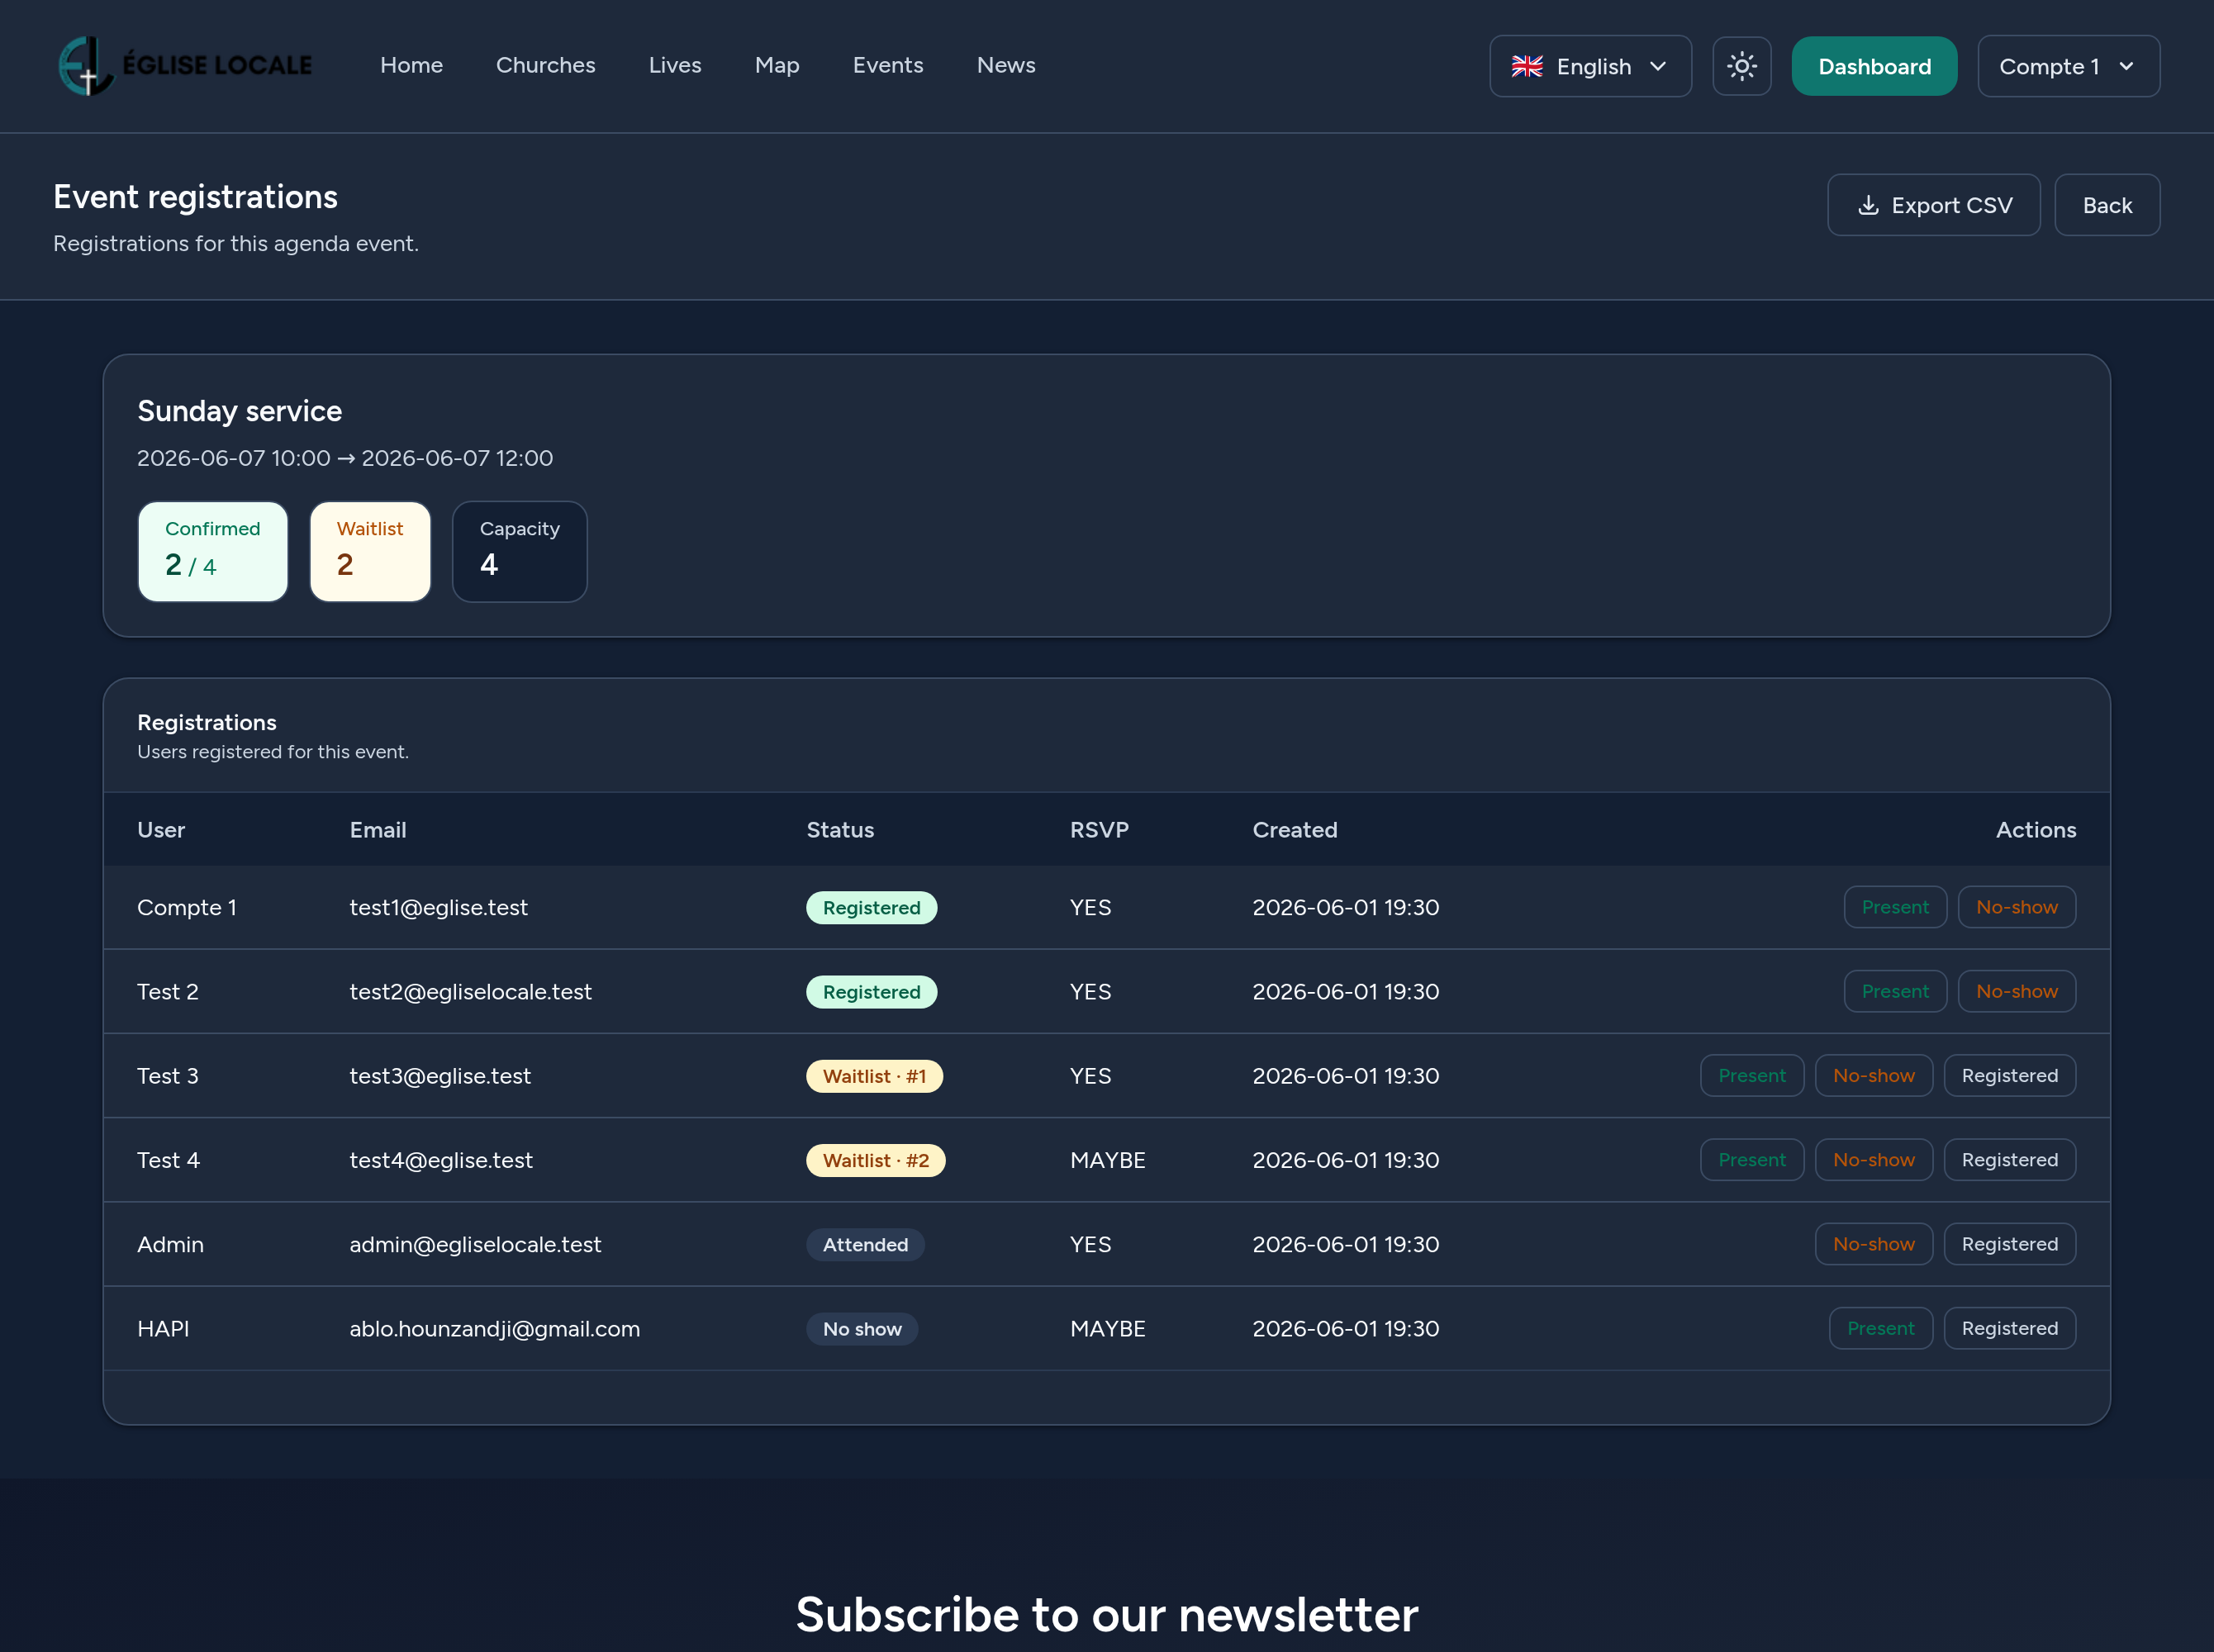
From the event's Registrations screen you can:
- See the confirmed and waitlist counts, and each waitlisted person's position.
- Export a CSV of all registrants (name, email, status, RSVP, date).
- Mark a registrant as Present, No-show, or move them back to Registered — useful for attendance after the event.
7 Step 5 — Where events appear & the calendar
Published, public events surface in several places:
- Your public church page — the Events section, with upcoming events.
- The platform events directory — searchable and filterable by country, city, category, type, date…
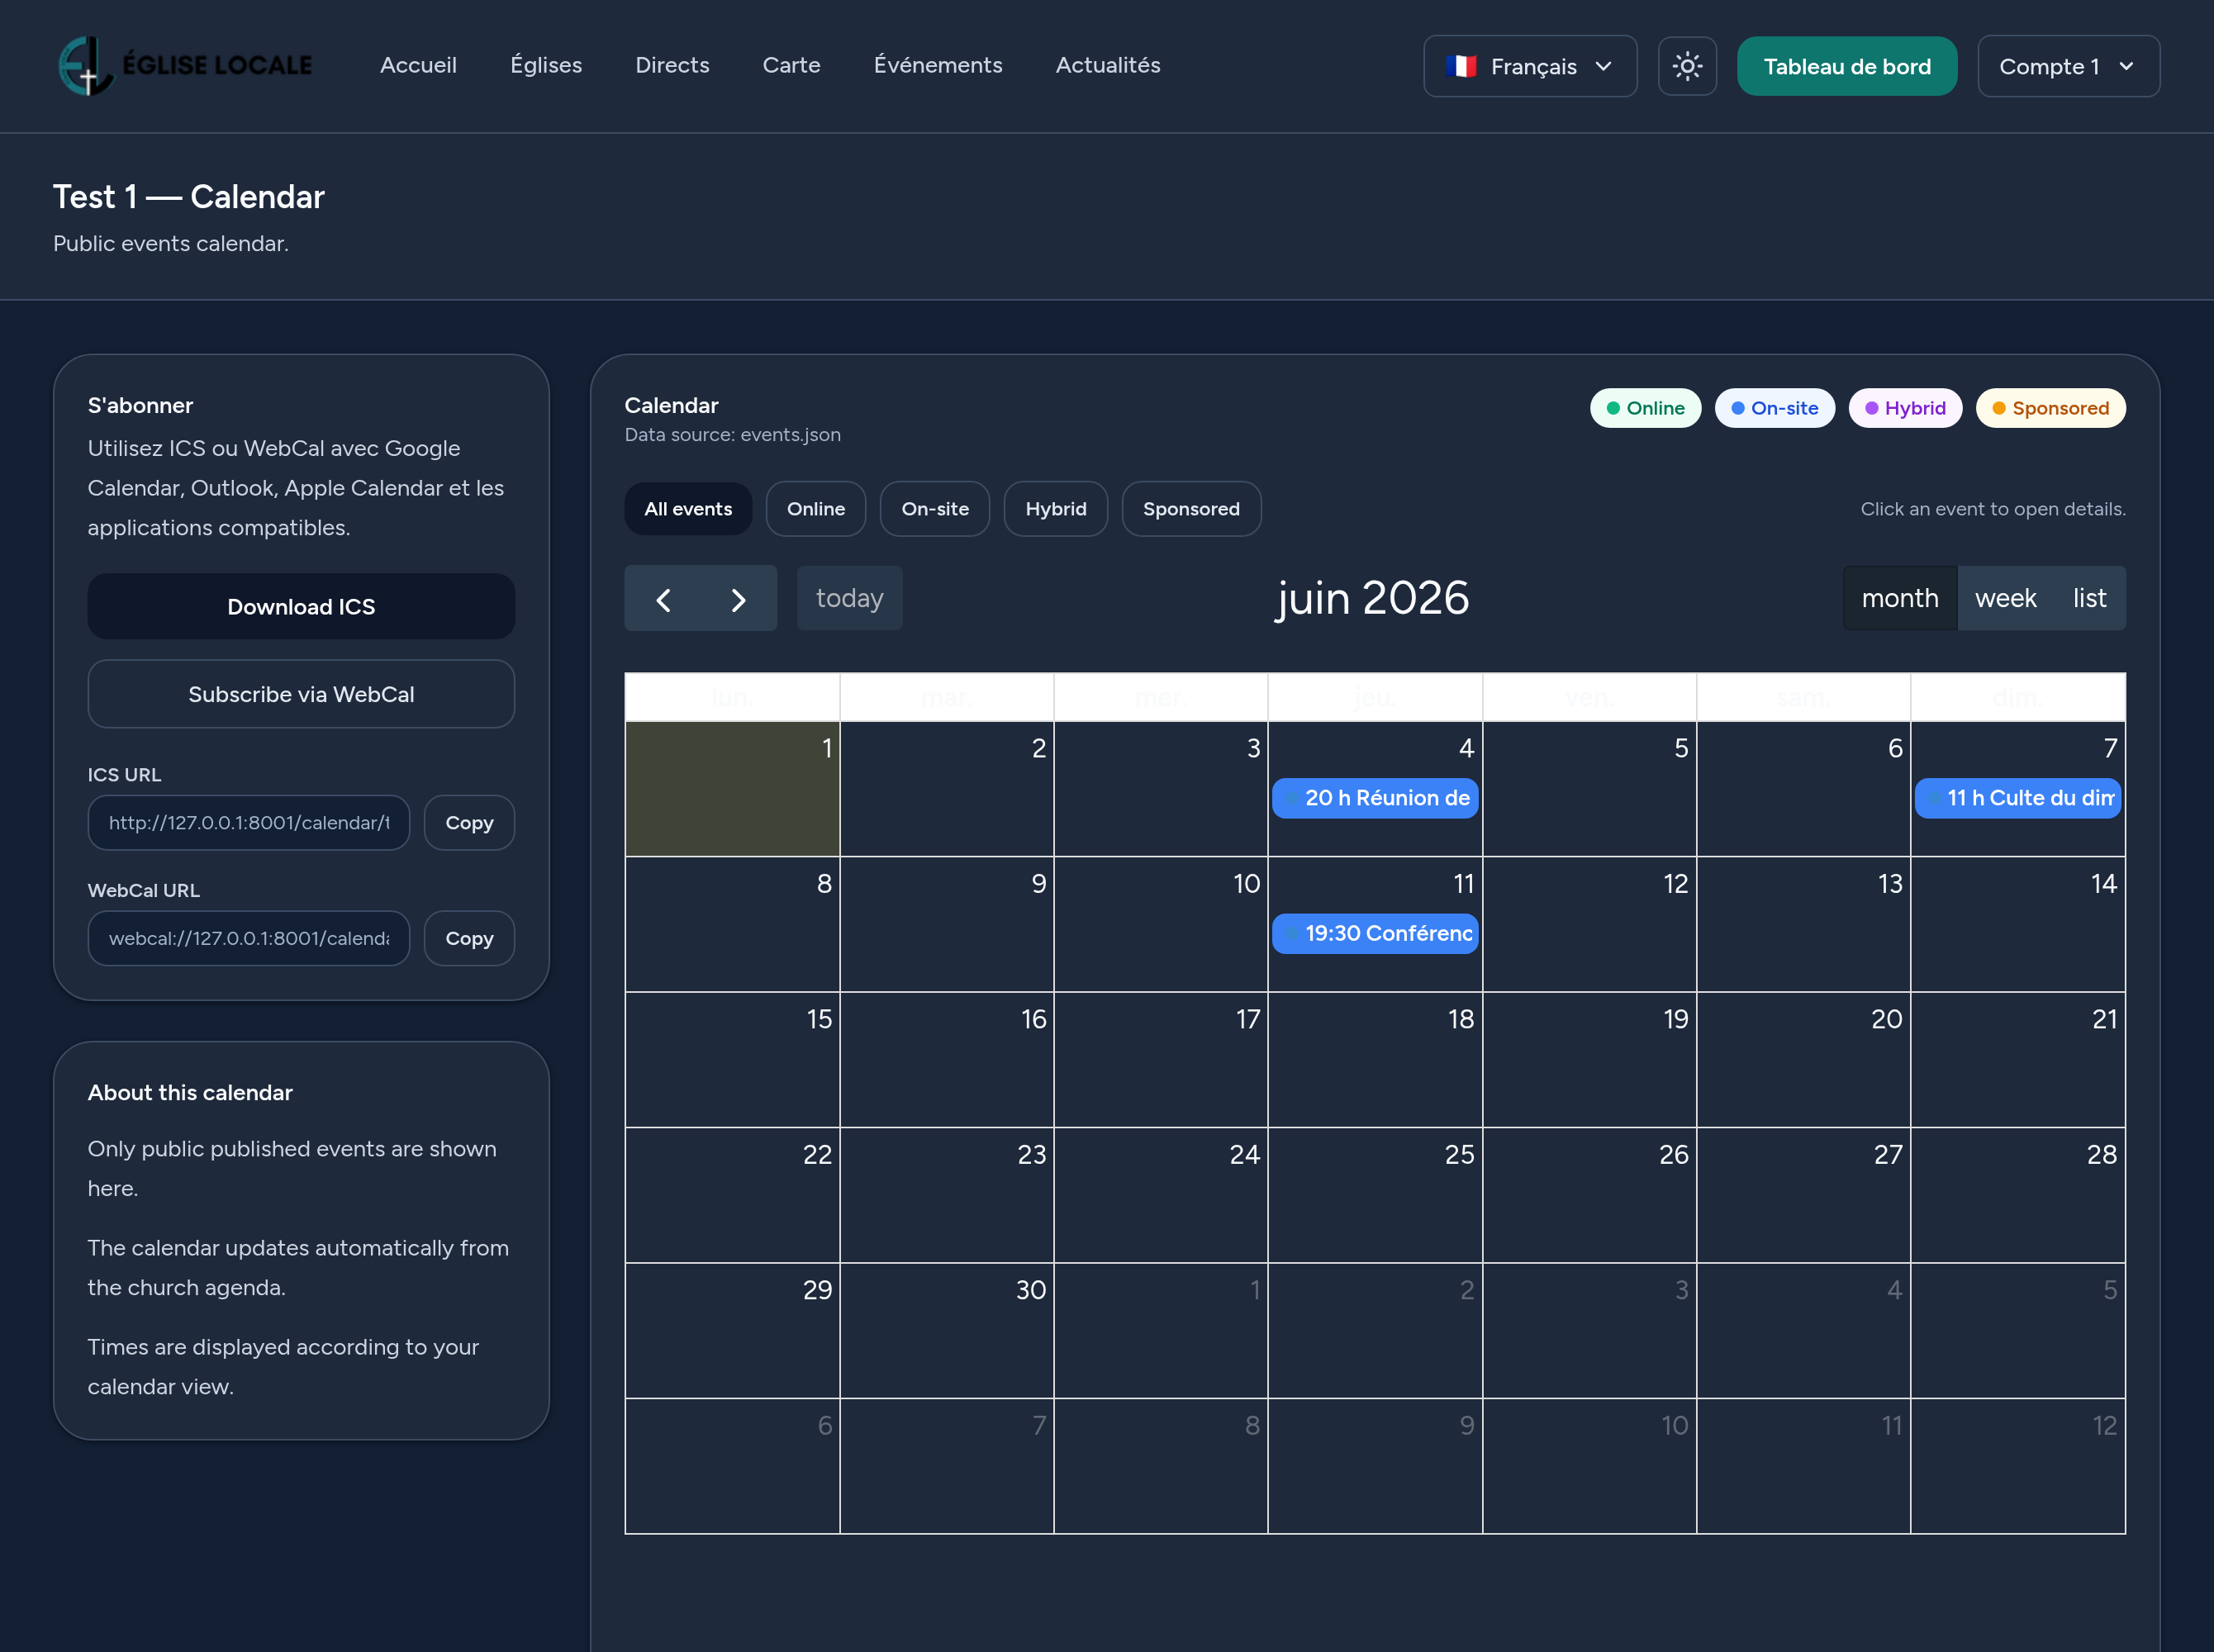
- A public calendar — month/week/list views, with type-based colours.
- Subscribe (ICS / WebCal) — visitors can download an .ics file or subscribe so events (including recurring ones) stay in sync in Google Calendar, Outlook or Apple Calendar.
8 Promote an event (optional)
You can boost an event so it stands out in the sponsored directory:
- Choose a promotion plan (level & duration) and complete the checkout.
- While active, the event is highlighted and its impressions, clicks and attributed views are tracked.
- Follow the promotion's performance (CTR, click-to-view) in its analytics.
Promotion is optional — your events work fully without it.
9 Analytics
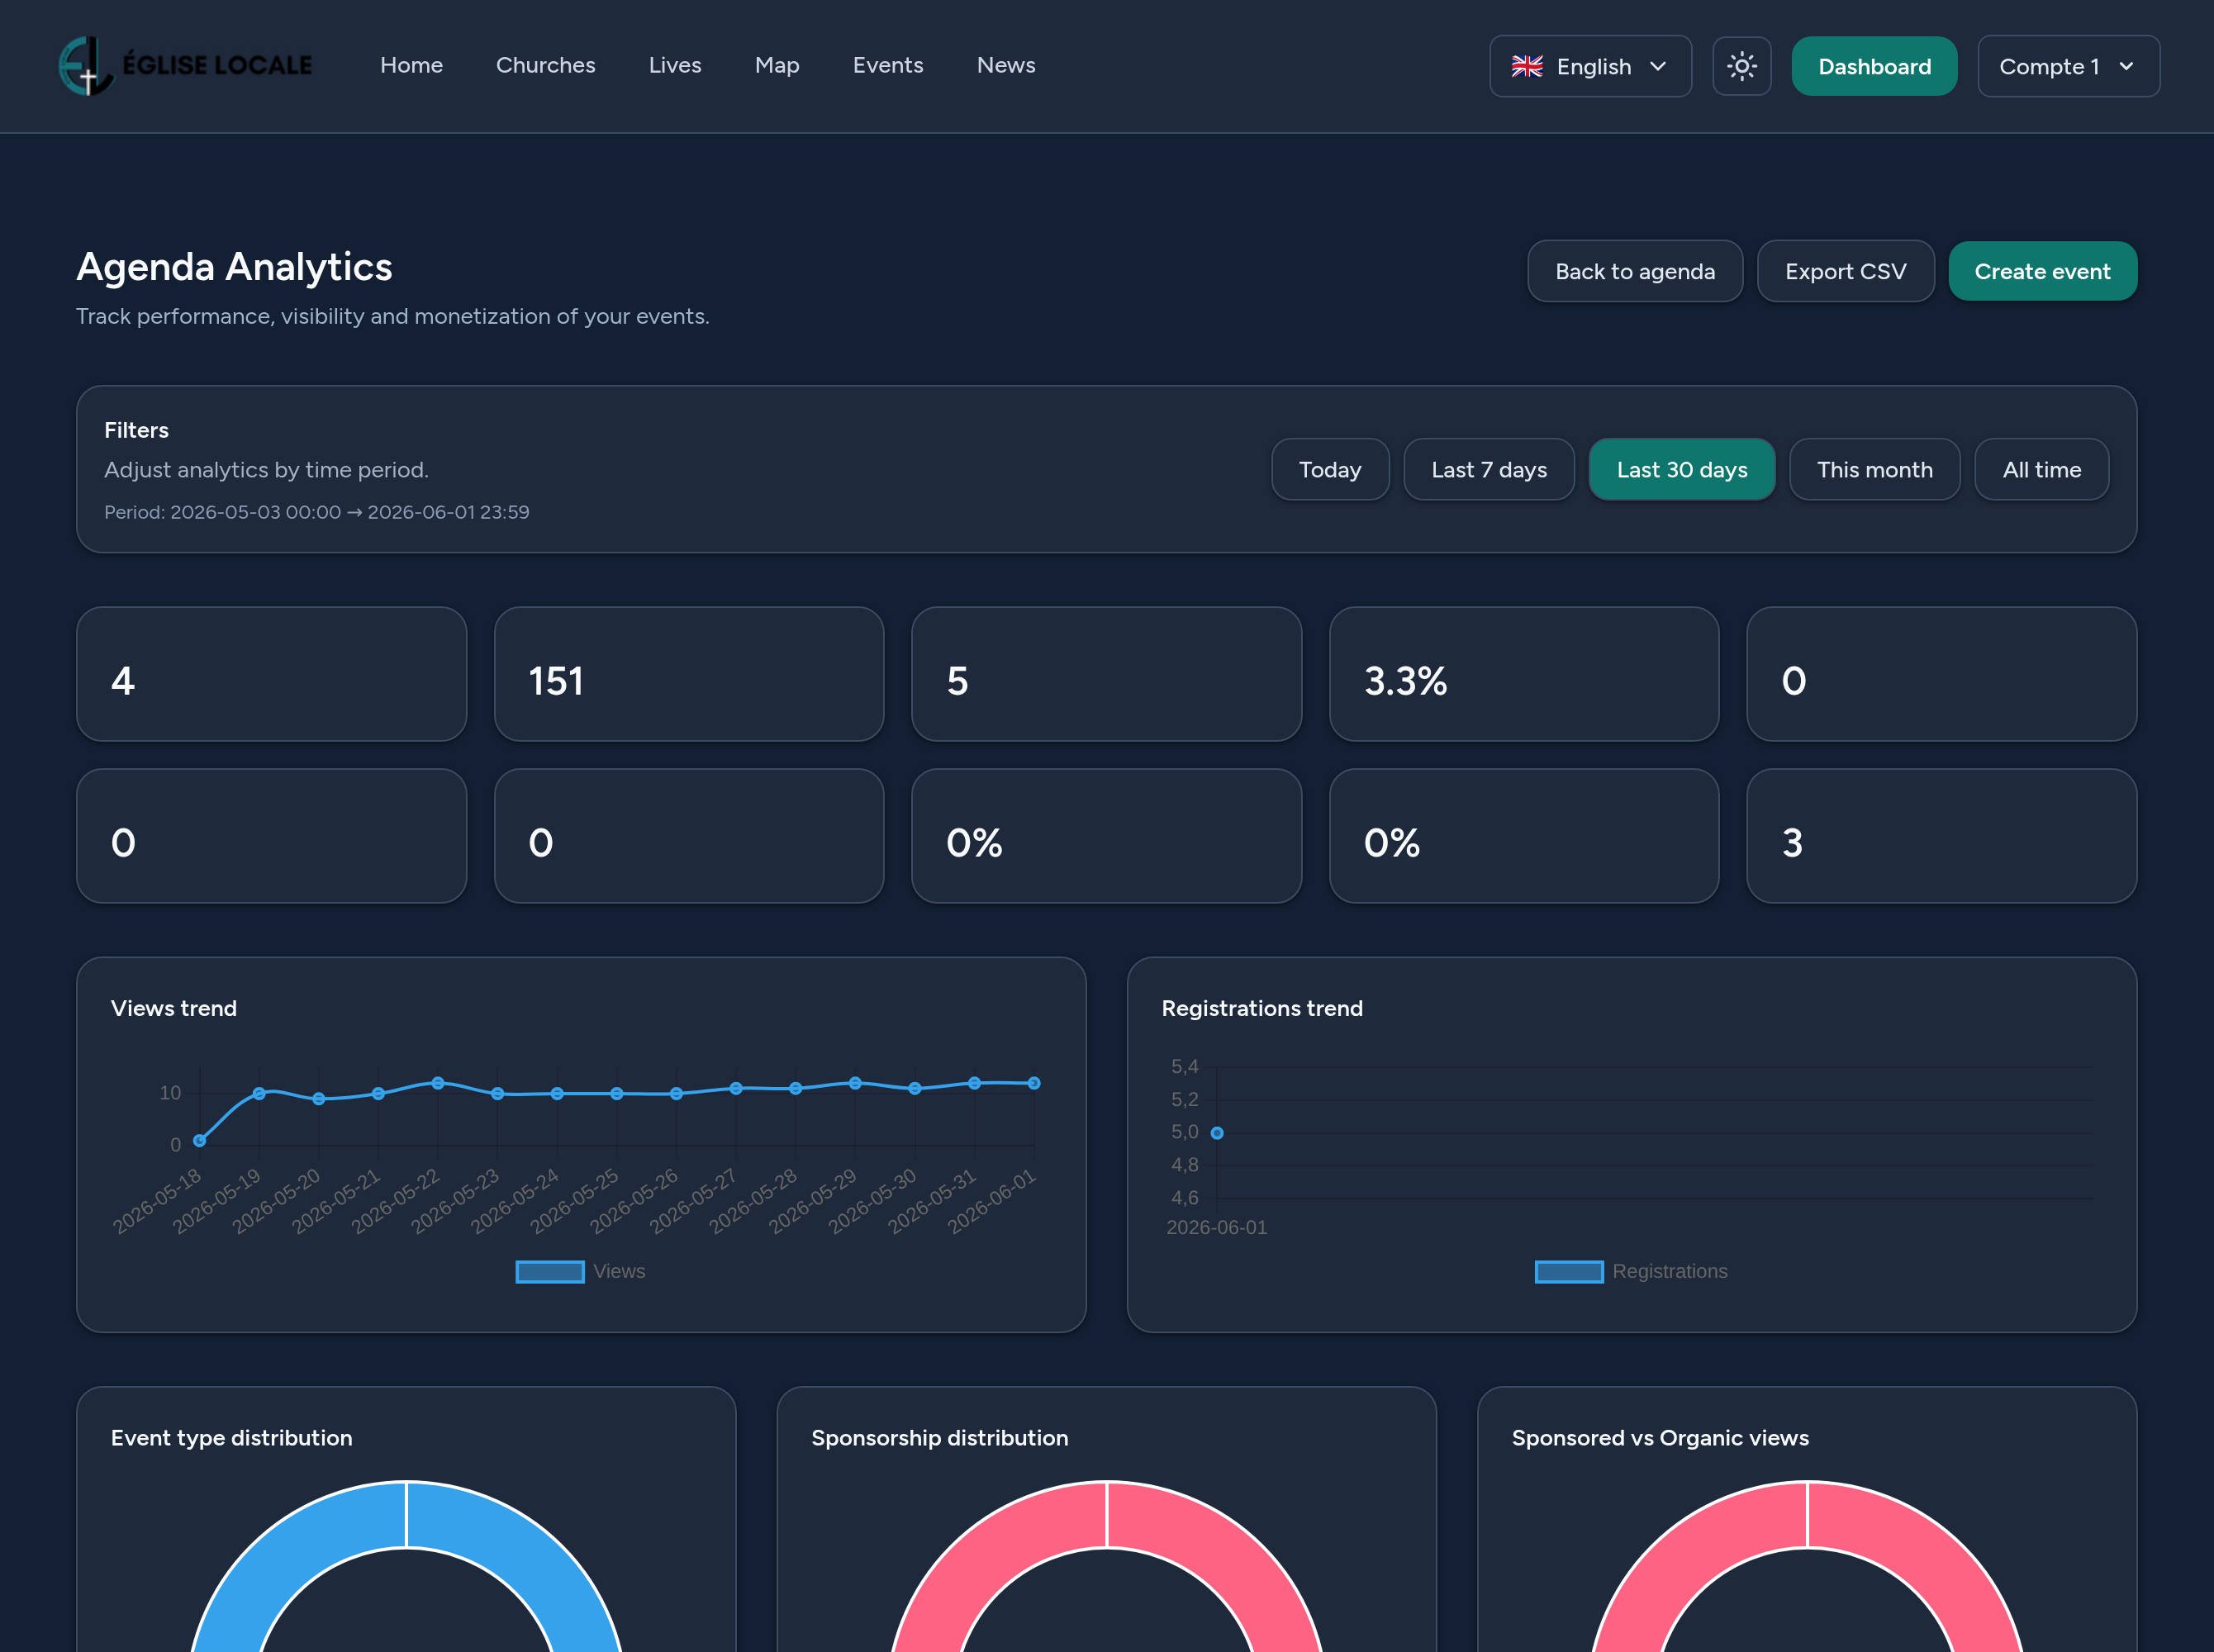
Each event has an analytics view: total views, registrations and the conversion rate, plus views and registrations over time and the RSVP breakdown. A global Agenda dashboard aggregates the figures across all your events, with leaderboards and a CSV export.
10 Tips & good practices
- Start as a Draft, review, then switch to Published.
- Write a punchy teaser — it's what people see on cards and in the directory.
- Set a capacity when seats are limited; the waitlist handles overflow for you.
- Use recurrence for weekly or monthly meetings instead of recreating them.
- Add an online link for hybrid events so remote attendees can join in one click.
- Export the registrant list before the event to prepare your welcome.
That's it — you're ready to plan, publish and fill your events with confidence.