Program module — Complete guide
Everything you need to plan, build, and publish your church service programs (orders of service): general information, recurrence, the order of service with contextual item fields, participants, the reusable library, versions, and where programs appear publicly.
12 sections
On this page
- 1. Overview
- 2. Before you begin
- 3. Step 1 — General information
- 4. Step 2 — Recurrence
- 5. Step 3 — Public visibility (privacy)
- 6. Step 4 — Build the order of service (items)
- 7. Step 5 — Participants
- 8. Live preview & saving
- 9. Reusable item library
- 10. Versions & history
- 11. Publishing & where programs appear
- 12. Tips & good practices
1 Overview
The Program module lets your church publish its orders of service — the structured plan of what happens during a worship service, mass, prayer meeting, or special event. A program brings together the date and time, the ordered list of items (songs, readings, prayers, preaching, announcements…), the people involved, and optional links to an agenda event or a live broadcast.
Once published, a program appears on your public church page and on a dedicated, printable page that visitors can also add to their calendar.
This guide walks you through the module from start to finish, so you can be fully autonomous: creating a program, organising its content, controlling what is shown publicly, reusing items, and recovering previous versions.
In short: create a program → fill in the general information → build the order of service → add participants → choose what is public → set the status to Published.
2 Before you begin
A few things to know before you start:
- Access: the module is available to churches whose plan includes the Programs feature. If you don't see it, check your subscription.
- Permissions: church owners, managers, and editors can create and edit programs.
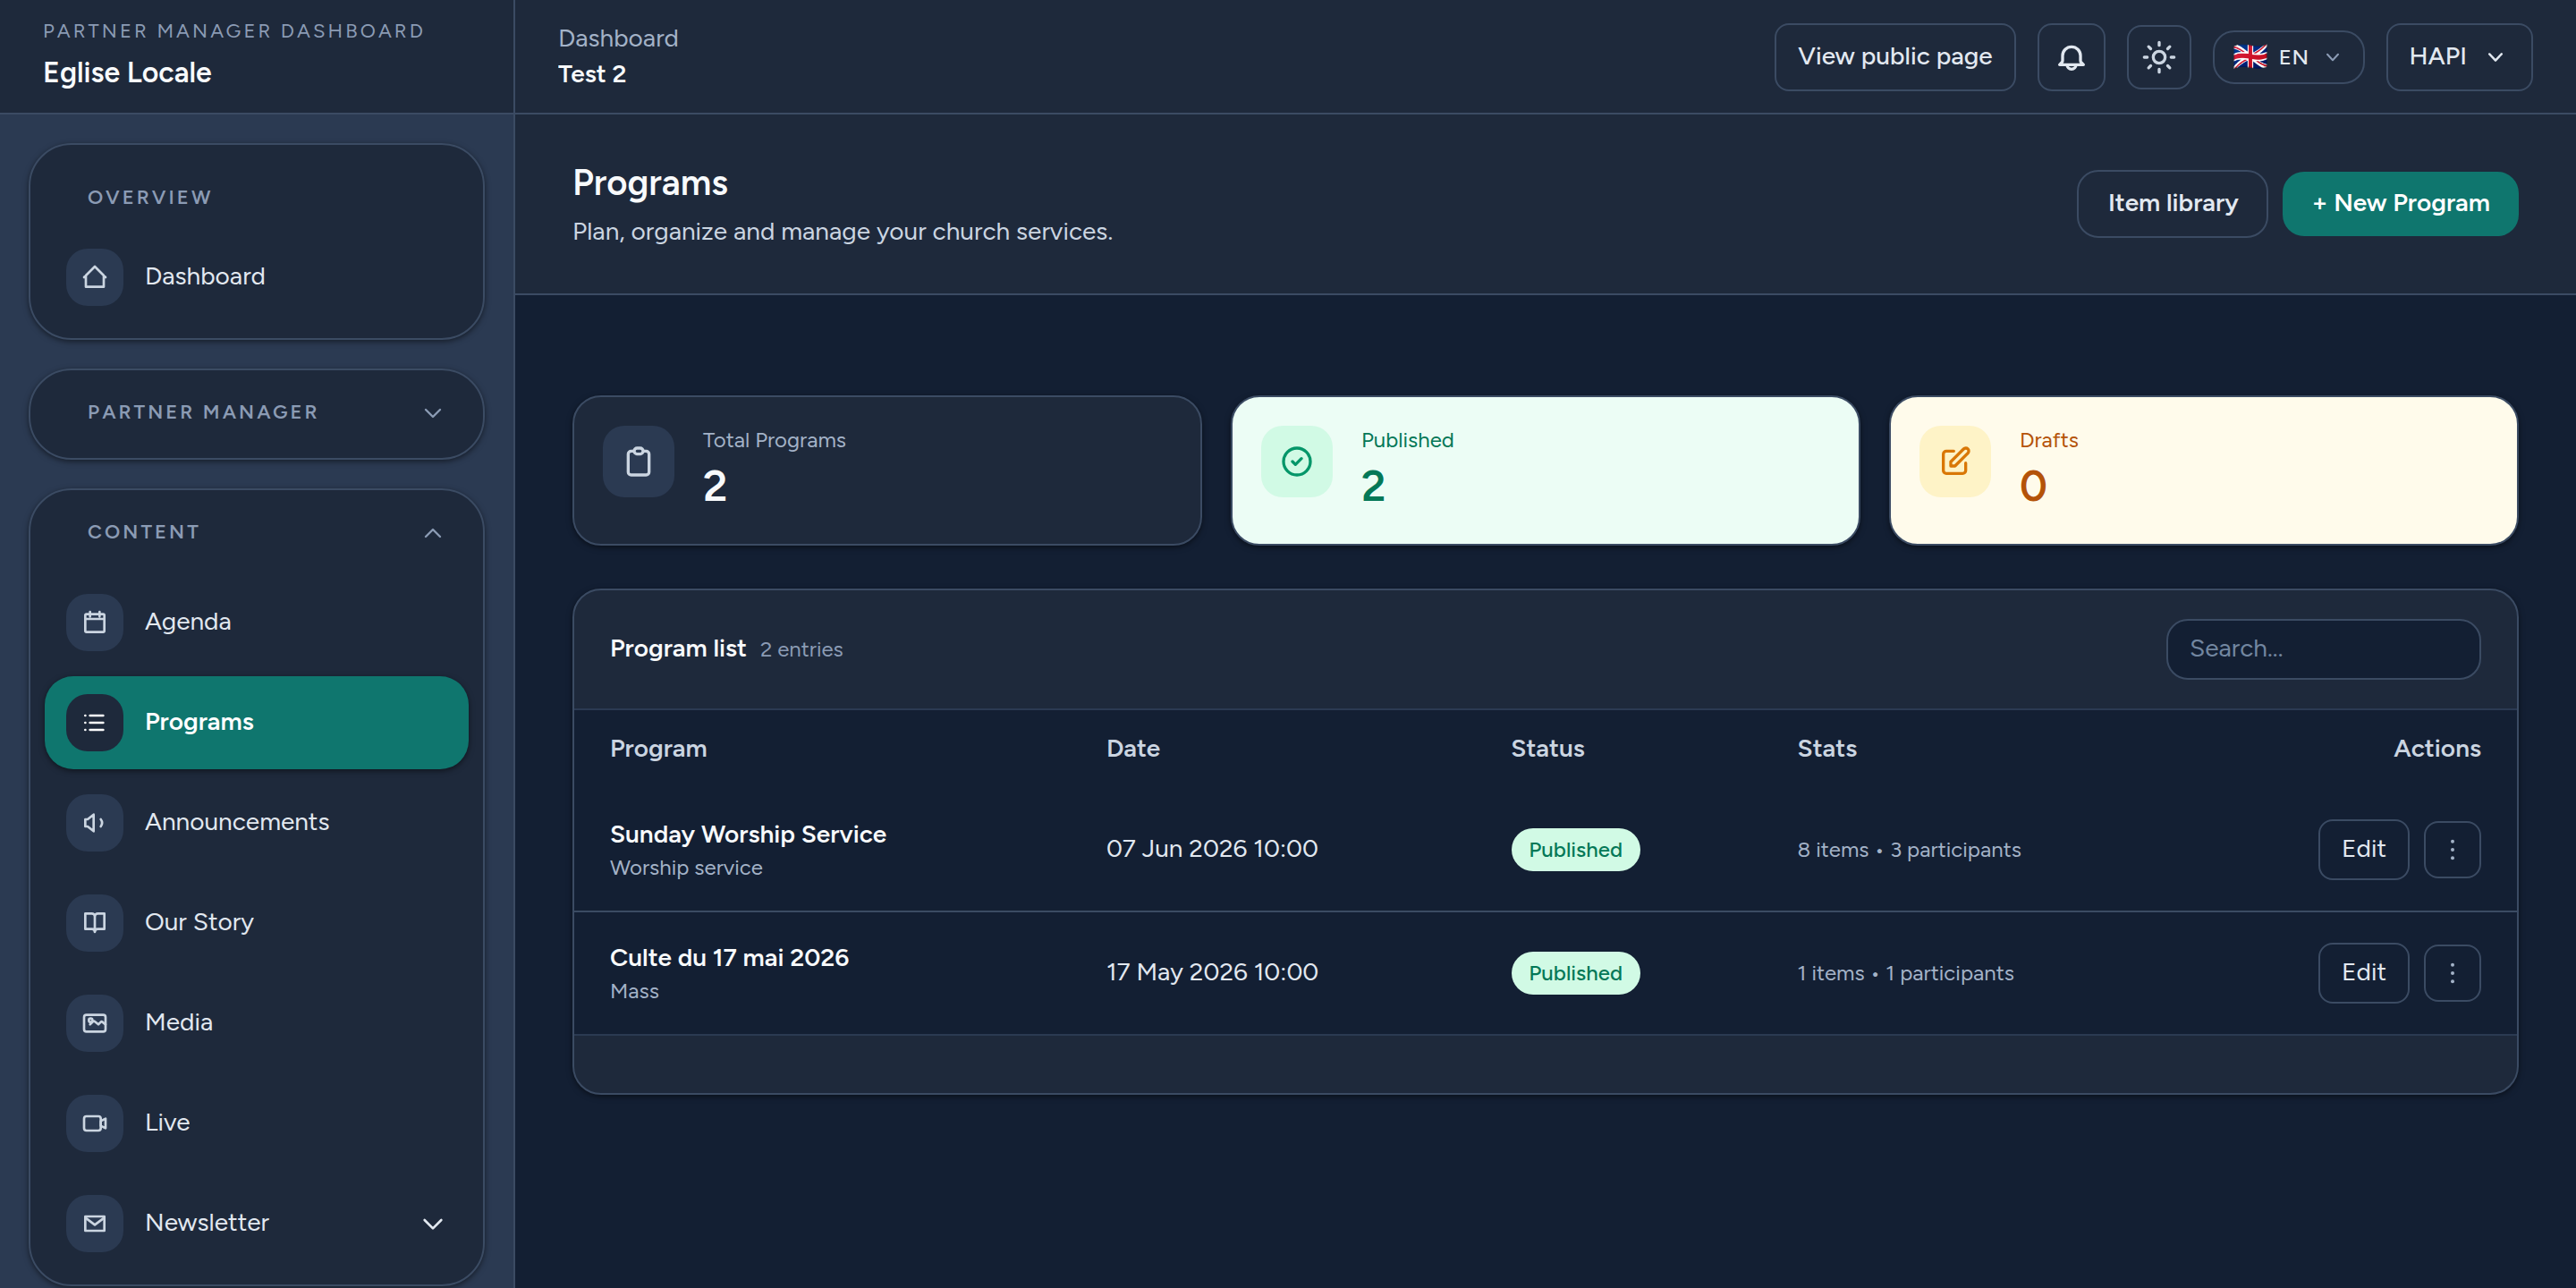
- Where to find it: open your Dashboard and go to Programs. From there you can see the program list, drafts, the trash, the item library, and the stats.
- Time zone: all dates and times are entered and shown in your church's configured time zone. The form reminds you which time zone is in use.
3 Step 1 — General information
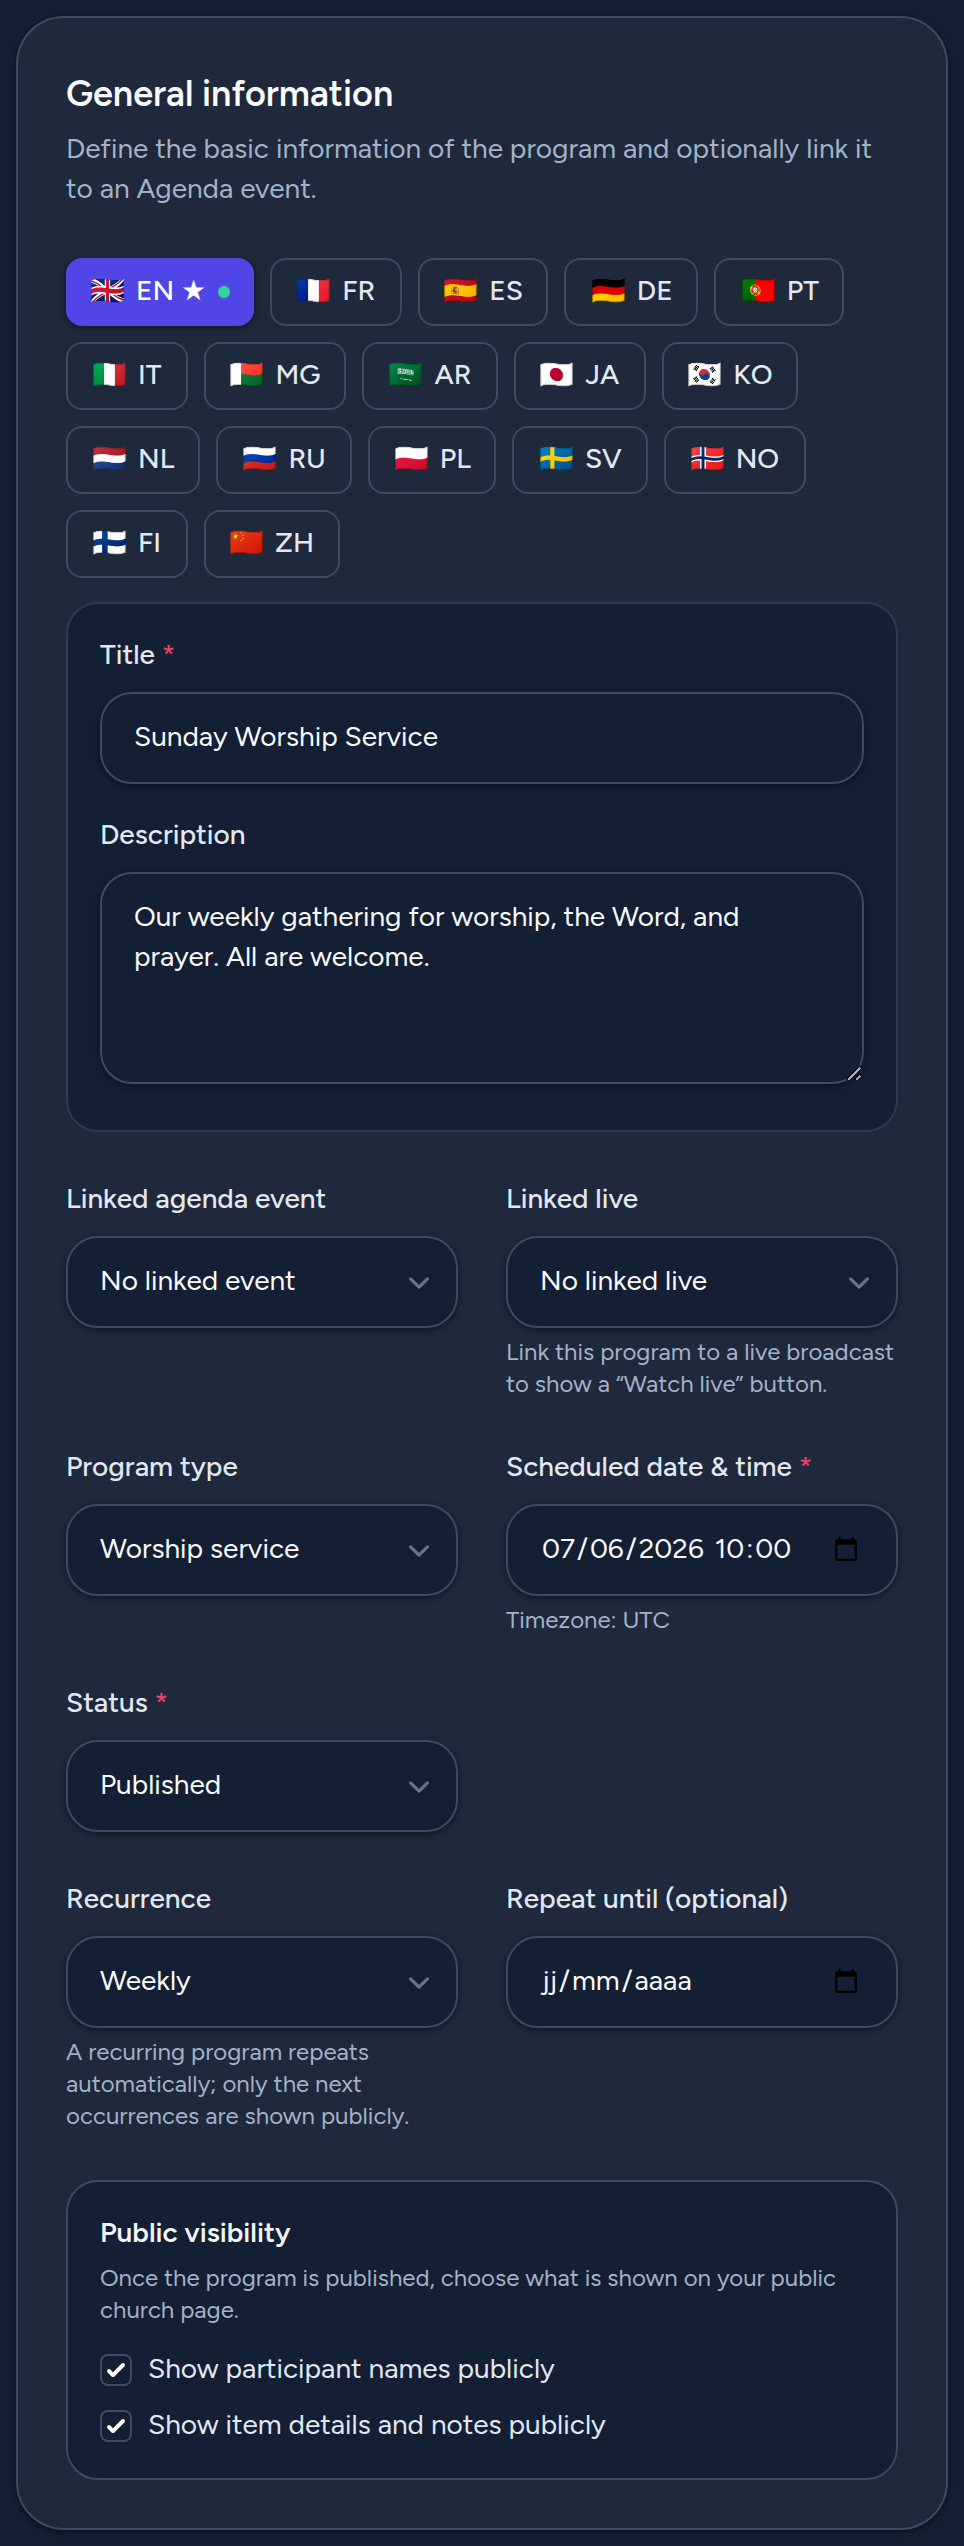
Click Create program (or edit an existing one) to open the builder. The first card, General information, defines the essentials:
- Title & description (per language): use the language tabs to enter the title and an optional description in each language you support. The default language (marked with a star ★) is required; a green dot shows which languages are already filled.
- Linked agenda event (optional): connect the program to an event from your Agenda. This ties the two together and helps with calendar export.
- Linked live (optional): connect the program to a live broadcast. When set, a “Watch live” button appears publicly so visitors can jump straight to the stream.
- Program type: choose the nature of the service — Worship service, Mass, Vigil, Prayer meeting, or Special service.
- Scheduled date & time: required. Entered in your church's time zone.
- Status: Draft (not visible publicly), Published (visible on your public page), or Archived (kept but hidden).
4 Step 2 — Recurrence
If the service repeats, set a Recurrence instead of recreating it every time:
- No recurrence — a one-off program.
- Daily, Weekly, or Monthly — the program repeats automatically from the scheduled date.
You can optionally set a Repeat until date to stop the recurrence. The program is stored once; the platform computes the upcoming occurrences automatically — there is no need to duplicate it.
Publicly, recurring programs always show their next occurrence, and the calendar export carries the recurrence rule so it repeats in the visitor's calendar too.
5 Step 3 — Public visibility (privacy)
The Public visibility box controls what visitors see once the program is published. By default, sensitive details stay private:
- Show participant names publicly — off by default. When off, the people you assign are hidden from the public page. The presiding minister (officiant) is always shown.
- Show item details and notes publicly — off by default. When off, the order of service is shown without the internal notes you added to each item.
Turn these on only when you are comfortable sharing that information with the public.
6 Step 4 — Build the order of service (items)
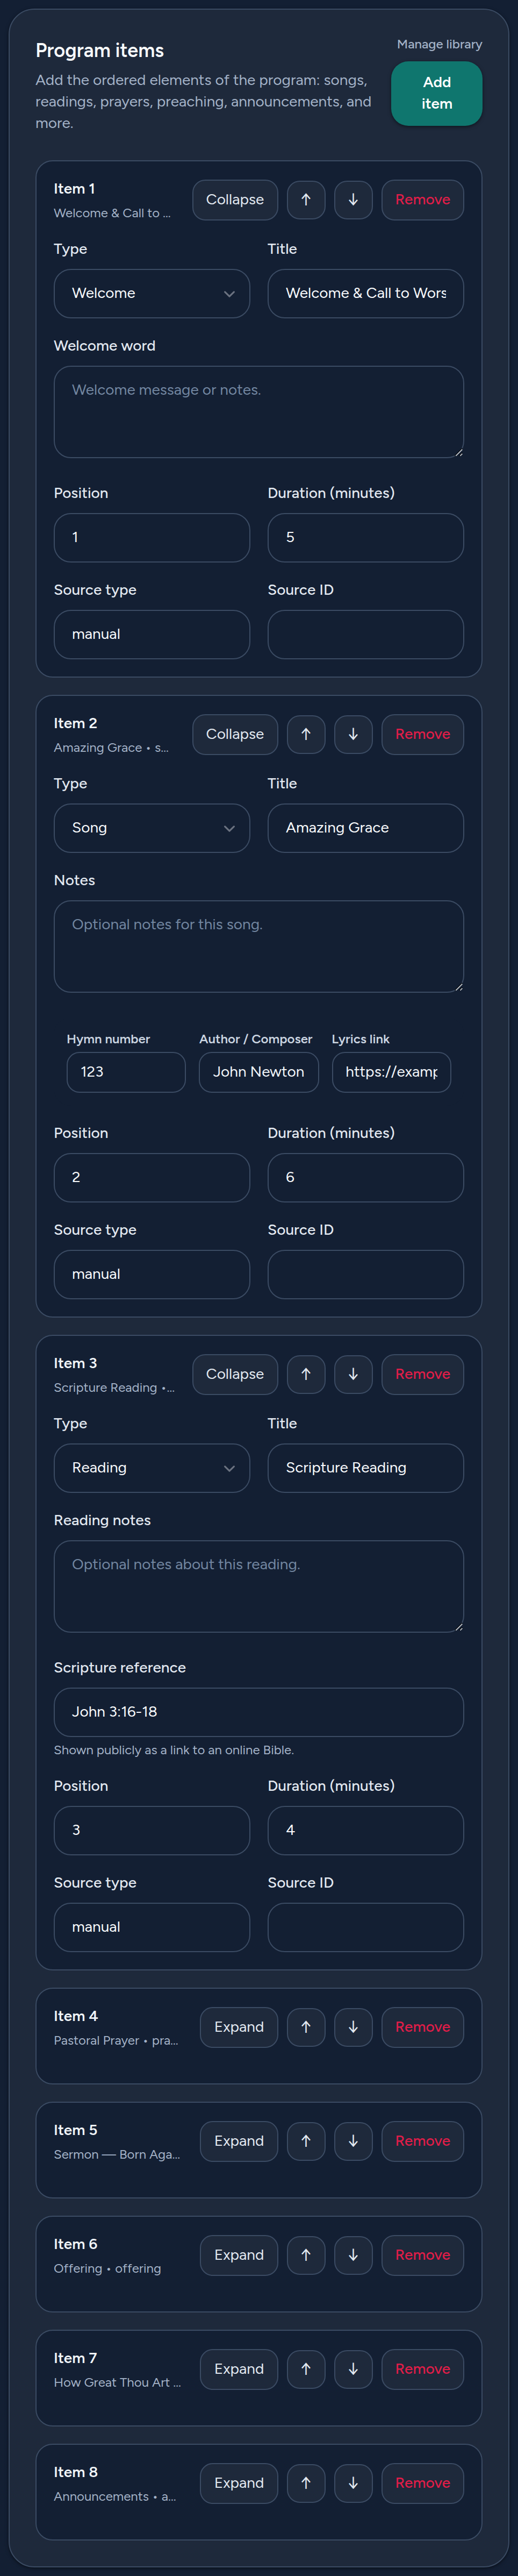
The Program items card is where you build the running order. Click Add item to add a row. For each item you can set:
- Type — Song, Reading, Prayer, Preaching, Announcement, Offering, Testimony, Welcome, or Other.
- Title — the name of the item (e.g. Amazing Grace).
- Content — a contextual note field whose label adapts to the type (see the table below).
- Duration (minutes) and Position — used for timing and ordering.
Fields adapt to the item type
To keep each item focused, the form shows only the fields that matter for the chosen type:
- Song → shows Hymn number, Author / Composer, and a Lyrics link. (No scripture reference.)
- Reading, Preaching, Prayer → show a Scripture reference field (e.g. John 3:16-18), displayed publicly as a link to an online Bible.
- Announcement, Offering, Testimony, Welcome, Other → show a contextual Content field (e.g. “Announcement details”, “Purpose / cause”, “Summary”, “Welcome word”).
Organising items
- Use the ↑ / ↓ buttons to reorder items.
- Use Collapse / Expand to fold a long item while you work.
- Use Remove to delete an item.
- Use Insert from library… to drop in a reusable item you saved earlier (see the Library section).
7 Step 5 — Participants
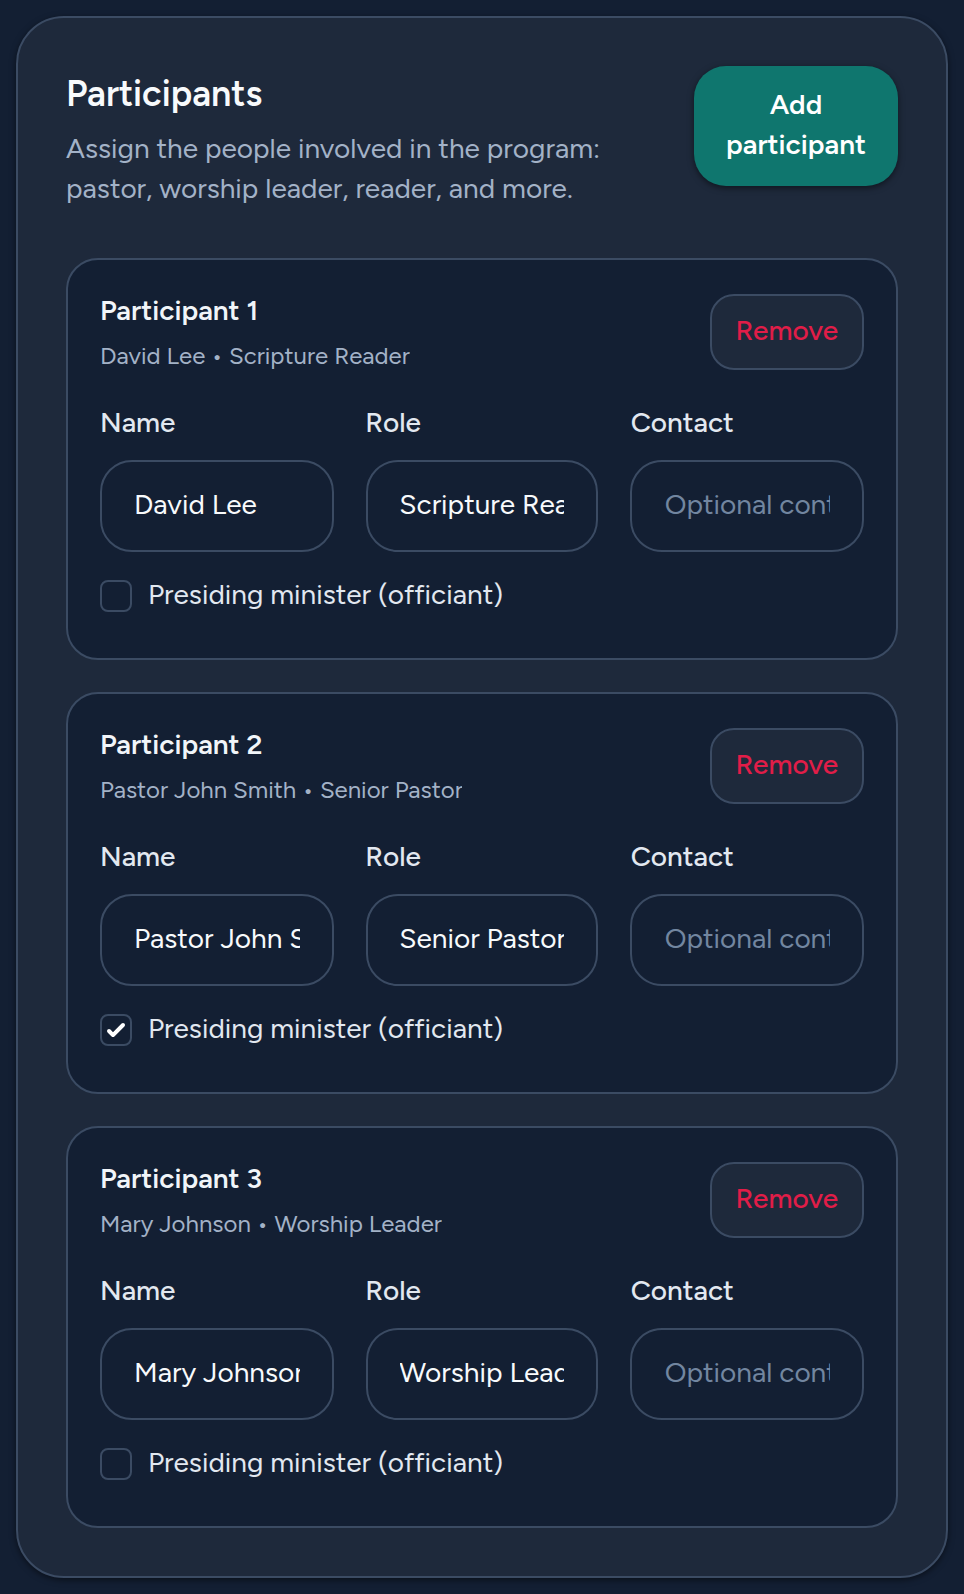
In the Participants card, click Add participant to assign the people involved — pastor, worship leader, reader, and so on. For each person you can set:
- Name
- Role (e.g. Pastor, Reader, Worship leader)
- Contact (optional, internal)
- Presiding minister (officiant) — tick this for the person leading the service.
Remember: participant names are hidden from the public page unless you enabled “Show participant names publicly” in Step 3. The officiant is always shown publicly.
8 Live preview & saving
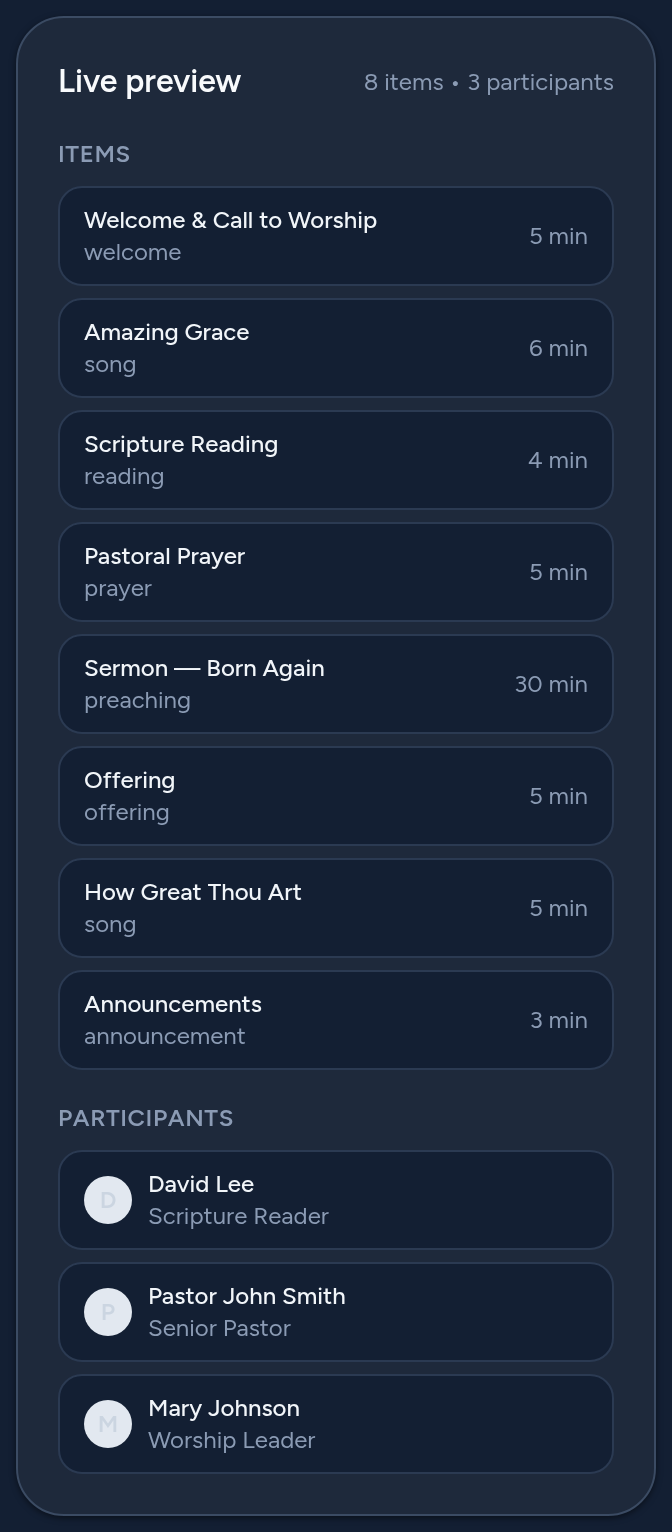
On the right of the builder, a Live preview panel updates as you type, showing the items and participants as they will be listed, along with a count and the durations.
When you are ready, click Save program (top-right on desktop, or at the bottom on mobile). Your changes are saved and a snapshot is recorded automatically (see Versions & history).
9 Reusable item library
The Item library lets you save items you use often — favourite songs, common readings, recurring prayers — and insert them into any program in one click.
- Open Programs → Item library (or “Manage library” from the builder).
- Click Add to library and fill in the title, type, content, and the type-specific fields (hymn number, author, lyrics link, scripture reference, duration…).
- Back in a program, use Insert from library… to add a saved item. You can still adjust it for that specific service afterwards.
Library items are reusable building blocks; editing a program's copy does not change the original library entry.
10 Versions & history
Every time you save a program, the platform records a version snapshot. This lets you review and recover earlier states:
- Open a program's History to see its previous versions.
- Use Restore to roll a program back to an earlier version.
Deleted programs are not lost immediately — they go to the Trash (Deleted programs), where you can Restore them if needed.
11 Publishing & where programs appear
To make a program visible to visitors, set its Status to Published and save. Published programs appear in several places:
- Your public church page — in the Programs section, with the upcoming program highlighted.
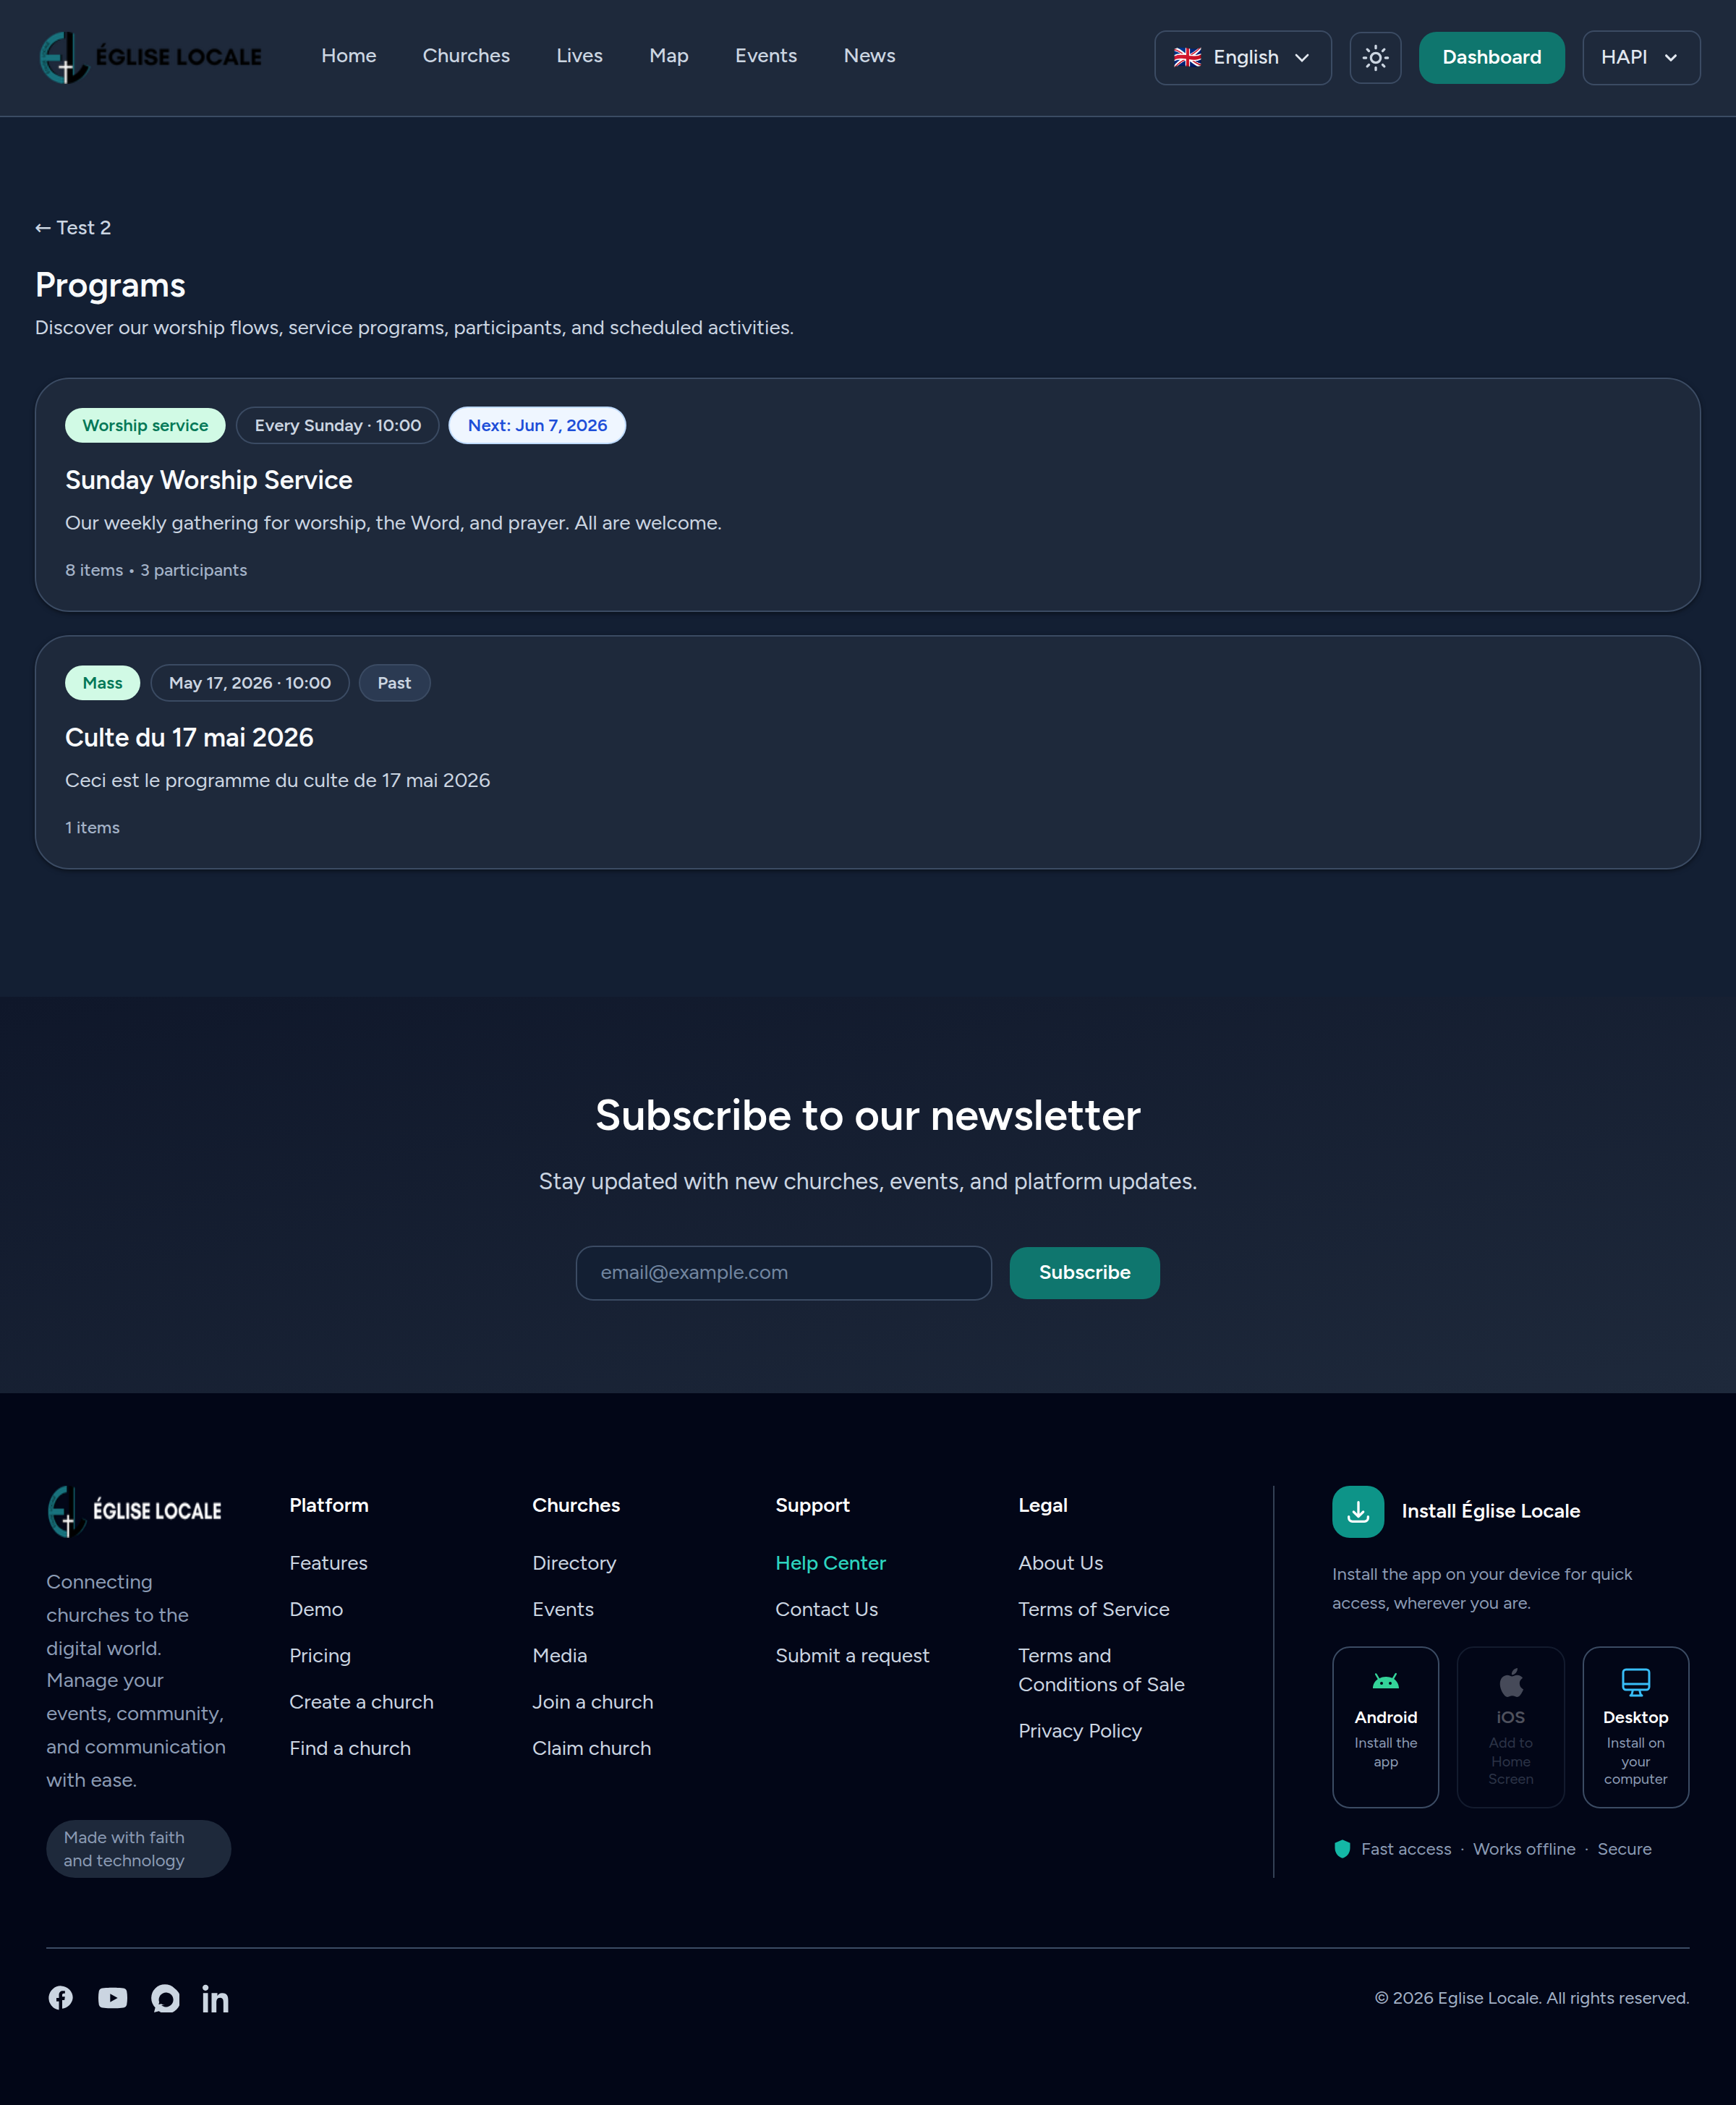
- The public programs list — an “All programs” page where visitors can browse every published program, upcoming first.
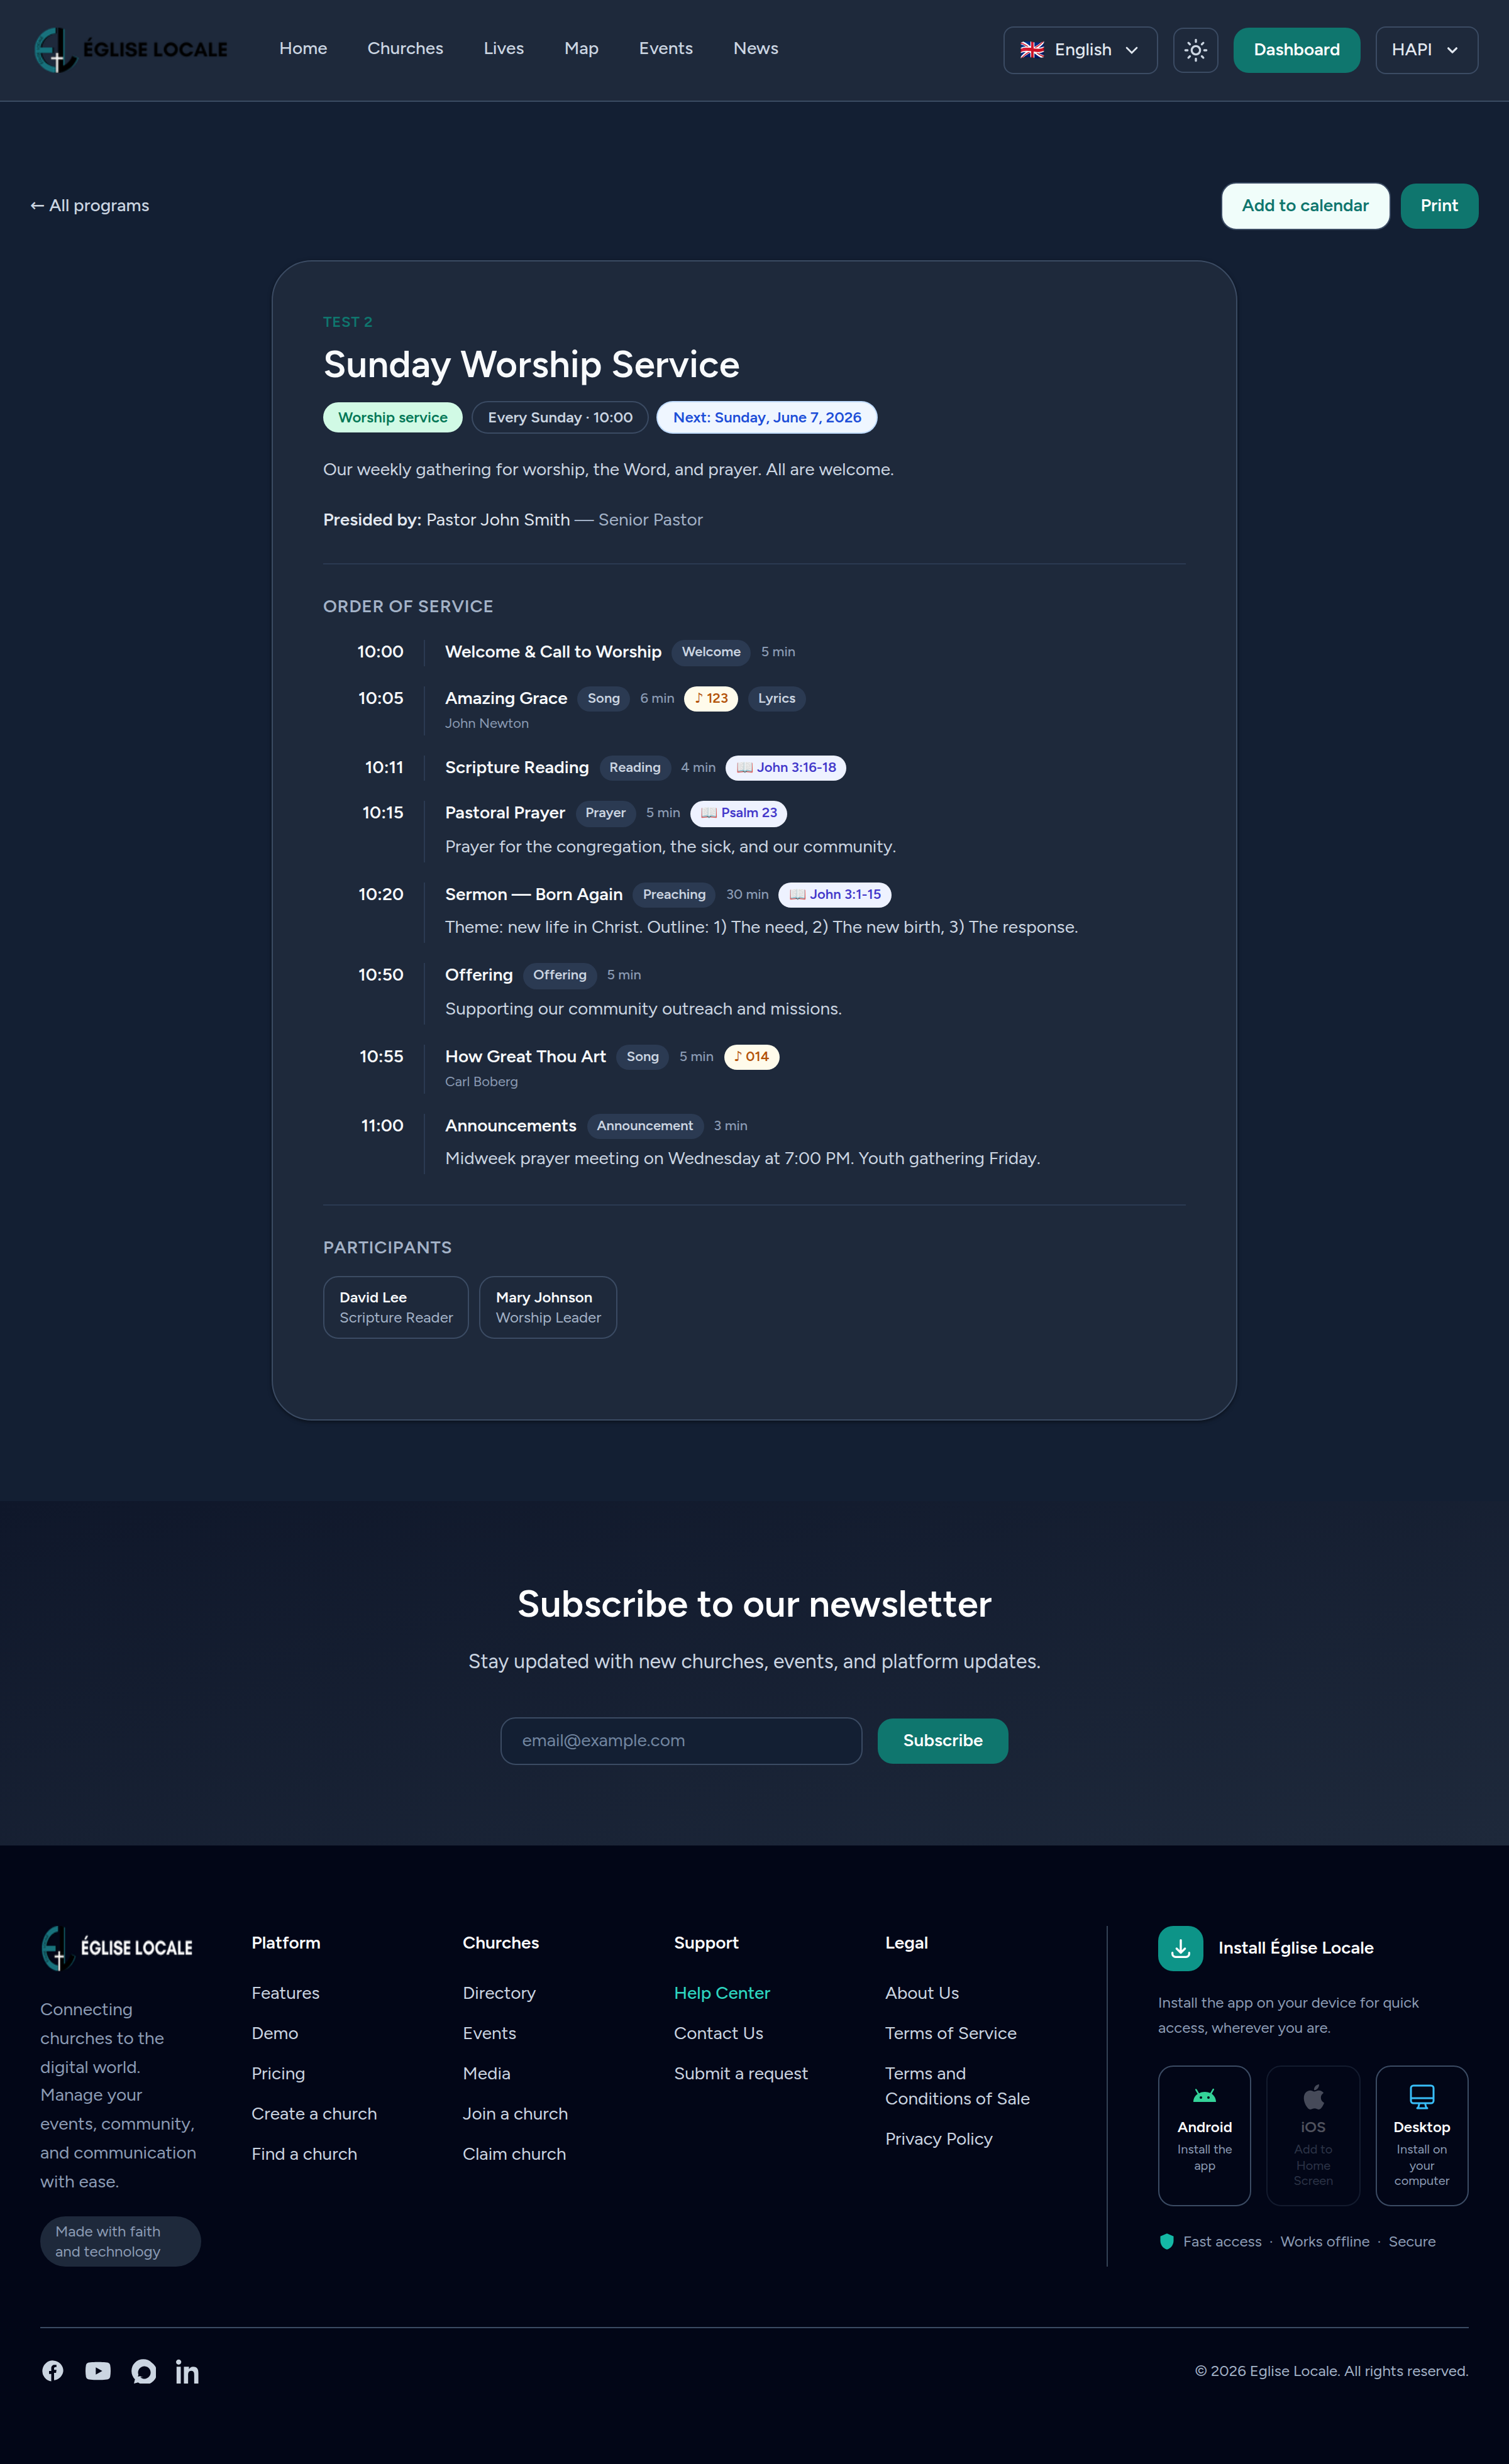
- A dedicated program page — a clean, printable order of service. Scripture references become links to an online Bible; songs show their details.
- Add to calendar — visitors can download an .ics file (recurring programs include the repeat rule).
- “Watch live” — when you linked a live broadcast (Step 1), a button takes visitors straight to the stream.
12 Tips & good practices
- Start as a Draft. Build and review the program privately, then switch to Published when it's ready.
- Fill the default language first. It's required; add other languages once the structure is settled.
- Use recurrence for weekly services instead of recreating them — the public page always shows the next occurrence.
- Keep notes private unless they're meant for visitors. Internal cues, names, and notes stay hidden by default.
- Build a library of your regular songs and readings to assemble new services in minutes.
- Set durations on items to get a realistic running time in the preview.
- Check the printable page before a service — it makes a clean handout for your team.
That's it — you now have everything you need to plan, build, and publish your church programs with confidence.