Announcements module — Complete guide
Everything you need to write, translate, publish, schedule and manage announcements for your church community.
8 sections
On this page
1 Overview
The Announcements module lets your church share updates and important messages with its community — service time changes, new teaching series, drives, special notices, and more. Each announcement has a title and a body, can be written in several languages, and is shown on your public church page.
You decide when each announcement goes live: publish it immediately, schedule it for later, or keep it as a private draft while you prepare it.
In short: write the title and body → translate it if you wish → publish now, schedule a date, or save as a draft → manage and update it any time.
2 Before you begin
- Where to find it: open your Dashboard and go to Announcements. From there you can list, create, edit and delete your announcements.
- Permissions: church owners, managers and editors can create and manage announcements.
- Plan quota: some plans limit the number of published announcements. If you reach the limit, you can unpublish or delete an older one, or upgrade your plan.
- Languages: the title and body can be translated; the default language is required. Visitors see each announcement in their own language when a translation exists. Translating into every language is itself a plan option — without it you write in the default language only.
- Plan options: beyond the basic title and body, your plan may unlock extras — scheduling, a cover image, pinning, an alert banner, categories, an expiry date, audience targeting, newsletter delivery and a public archive. Only the ones your plan includes appear in the form.
3 Step 1 — Write an announcement
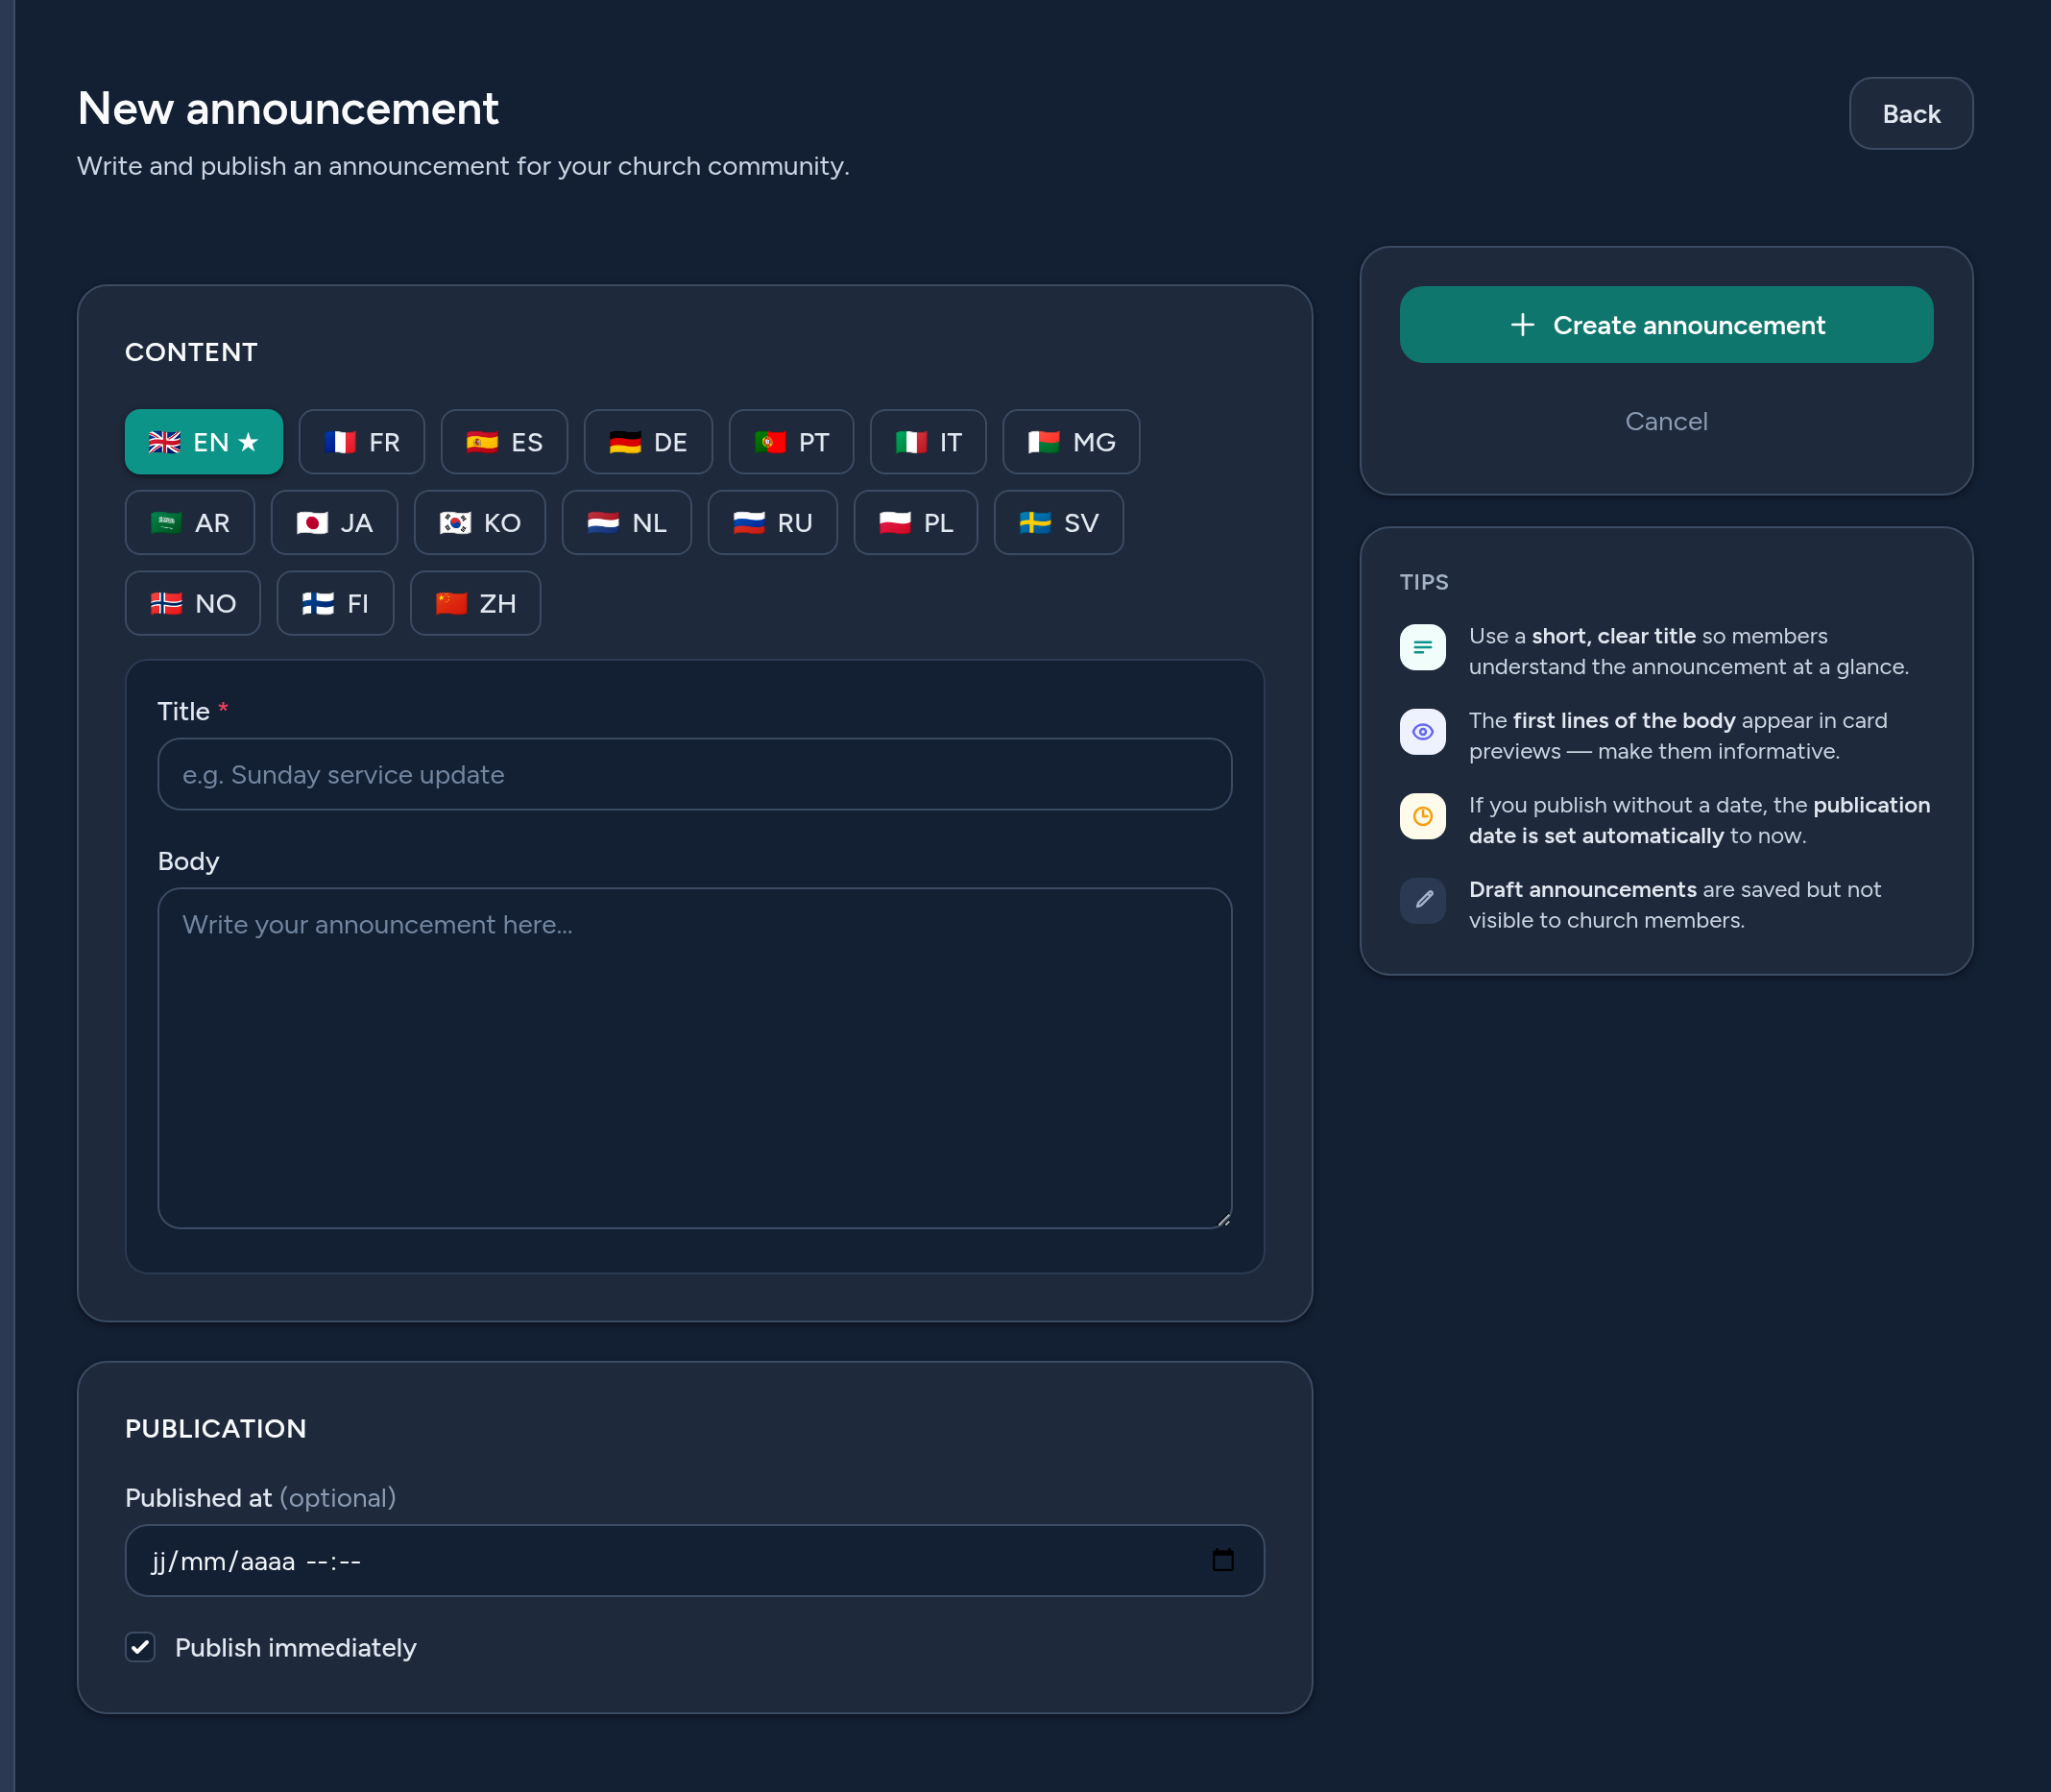
Click New announcement and fill the form:
- Title (per language) — a short, clear title (up to 160 characters). The default language is required; use the language tabs to add translations.
- Body (per language) — the full message. The first lines appear in card previews, so make them informative.
You only need to fill the languages you support — a language left empty simply won't have a translation, and visitors will see the default language instead.
4 Step 2 — Publish, schedule, or save as draft
The Publication card controls when the announcement becomes visible:
- Publish immediately — tick this to make the announcement public right away. If you don't set a date, the publication date is set automatically to now.
- Schedule it — when your plan includes Scheduling, set a future Published at date and keep it published: the announcement stays hidden from the public until that moment, then appears automatically. Without that option, publishing means publishing now.
- Save as a draft — untick Publish immediately. Drafts are saved but not visible to church members, so you can prepare an announcement and publish it later.
Published announcements are shown newest first, using their publication date.
5 Step 3 — Manage your announcements
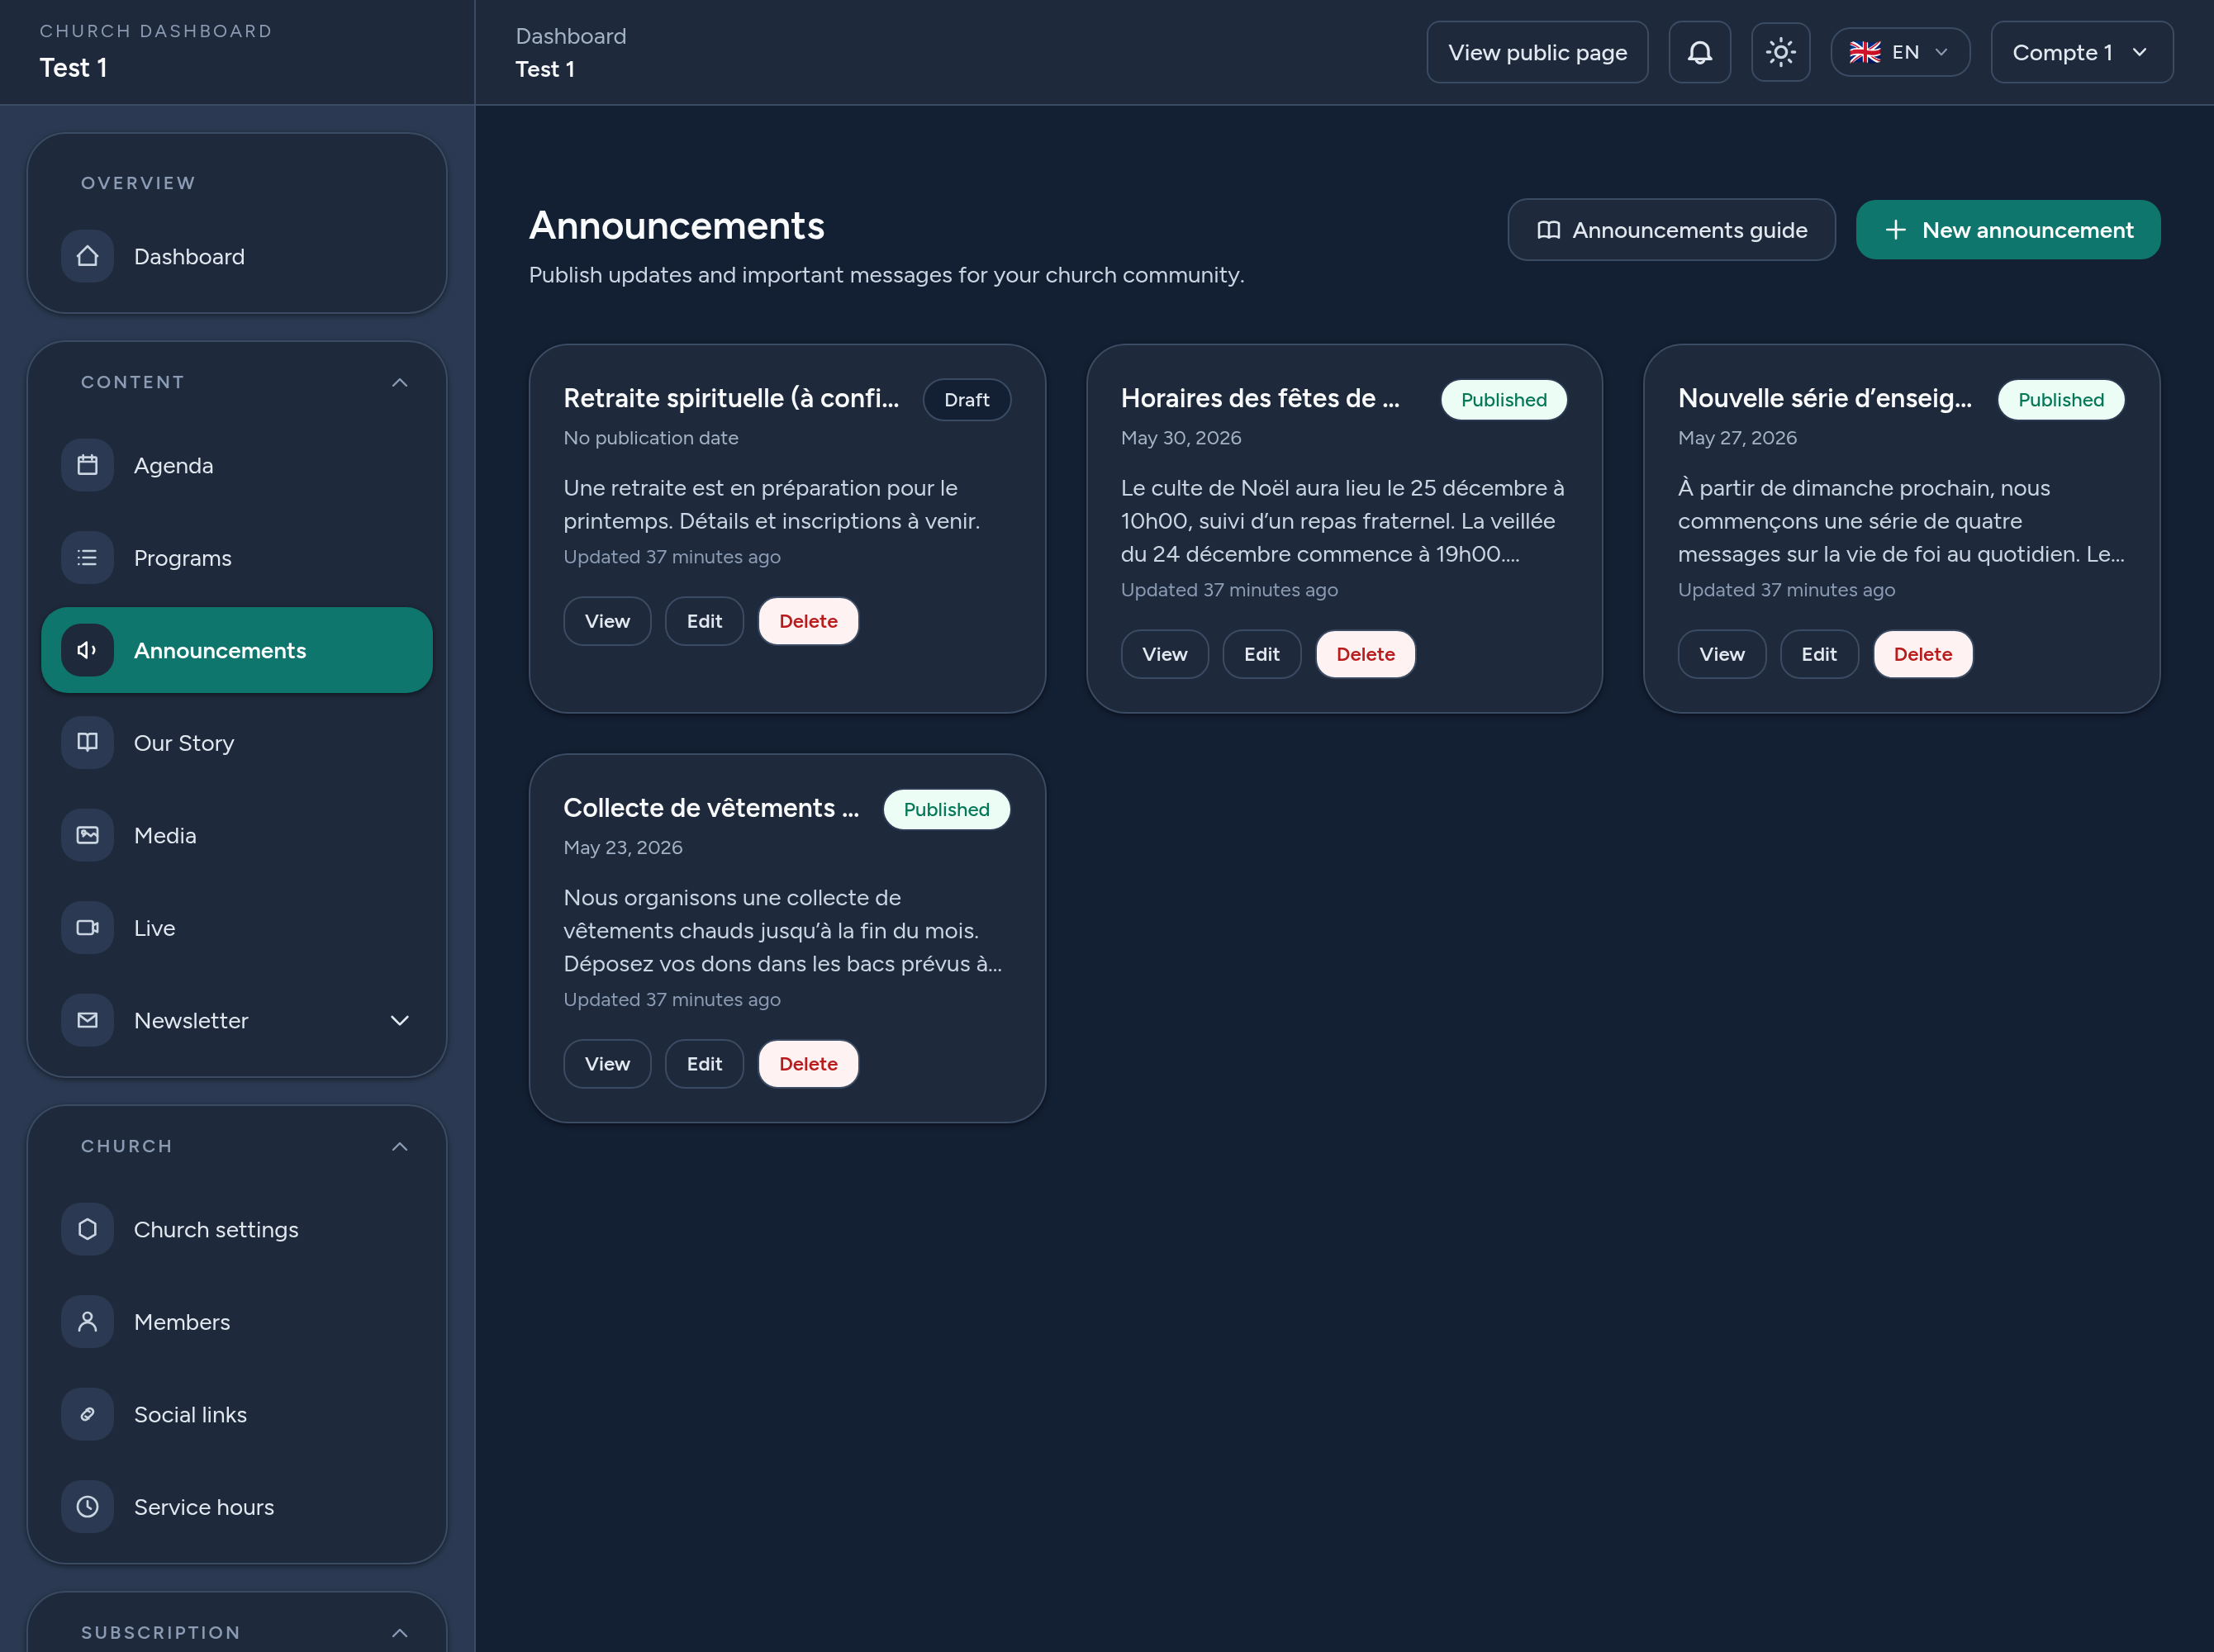
The Announcements list shows every announcement as a card with its status (Published or Draft) and date. For each one you can:
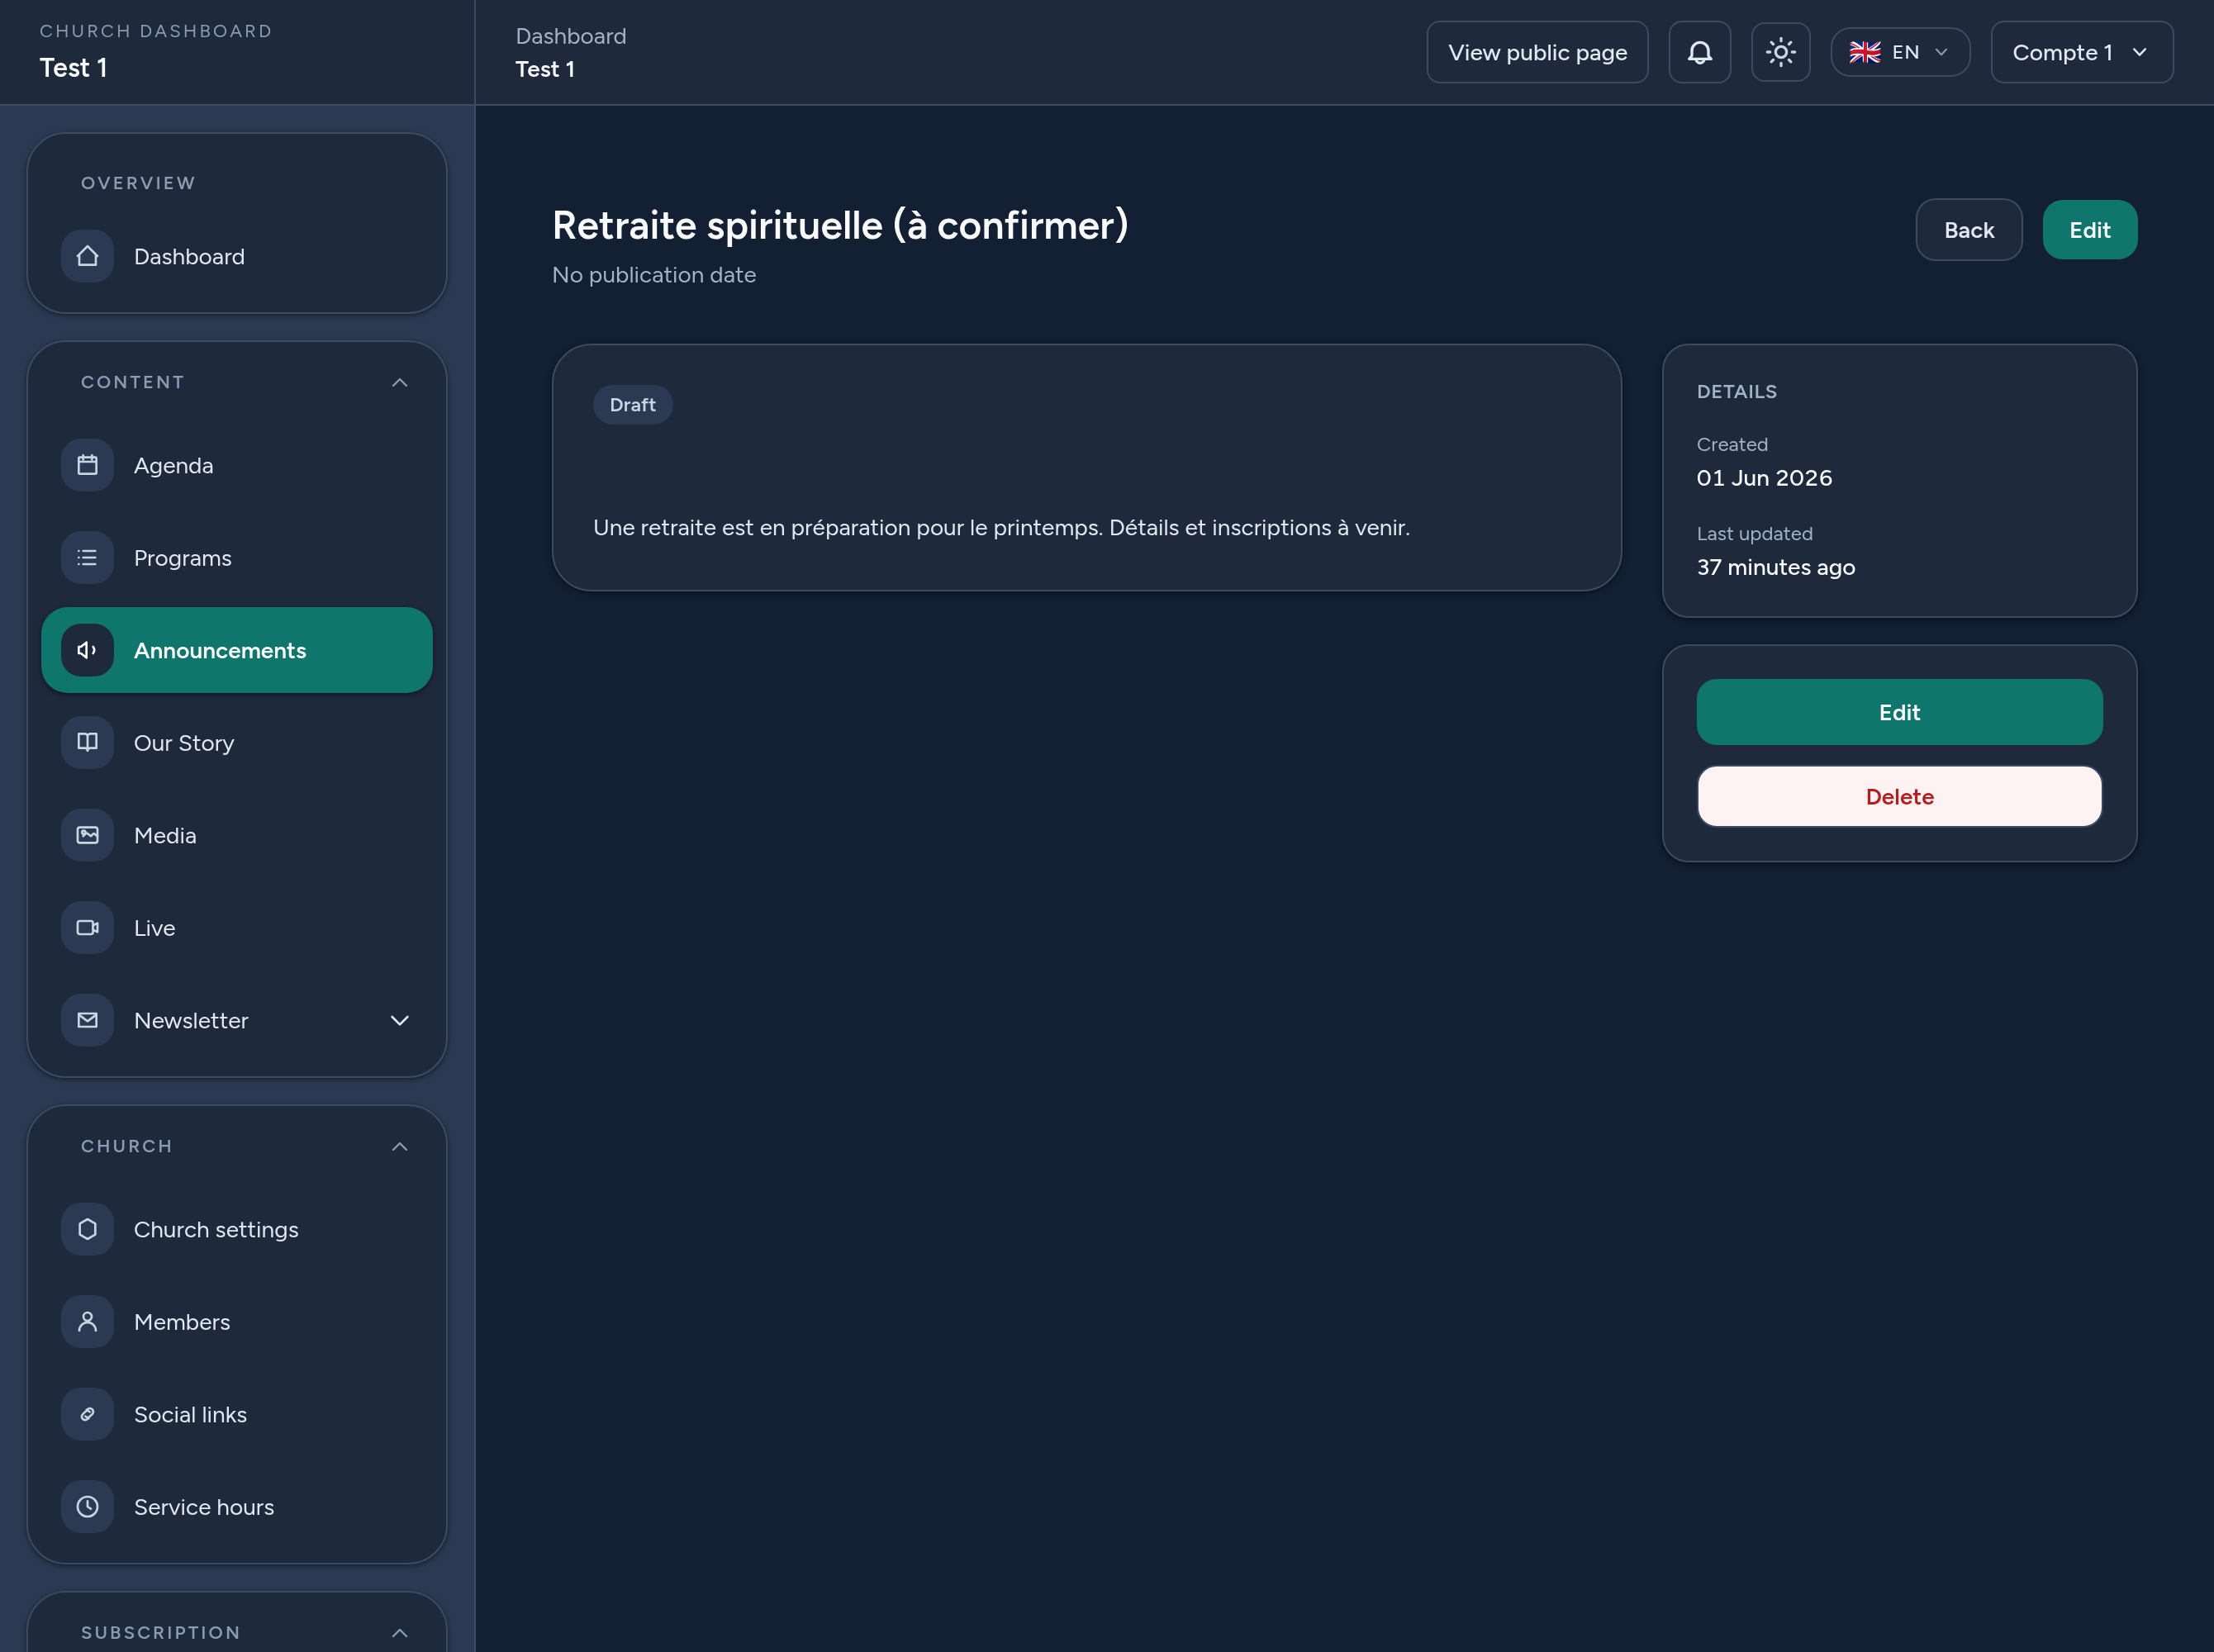
- View — open the full announcement and its details (status, publication date, last update).
- Edit — change the title, body, translations, or publication settings.
- Delete — remove the announcement permanently (this cannot be undone).
6 Announcement options included in your plan
Depending on your plan, an Announcement options panel appears under the editor. Every field there is optional — an announcement works perfectly without any of them.
- Cover image — a picture shown above the announcement, in your dashboard and on the public page.
- Category — tag the announcement as Urgent, Event, Prayer or Administrative. A coloured chip appears next to it, and visitors can filter the archive by category.
- Pin to the top — keep an important announcement first in the list, whatever its date. Your plan may cap how many can be pinned at once.
- Alert banner — lift the announcement out of the list and show it across the top of your public page. Reserve it for what is genuinely urgent.
- Expiry date — the announcement disappears on its own once the date has passed. Ideal for a registration deadline or a one-off notice: no need to remember to remove it.
- Audience — choose between everyone and signed-in members only. A members-only announcement is never shown to anonymous visitors.
- Relay to affiliated churches (faîtières) — the announcement also appears on the public page of every affiliated church, marked as coming from the federation. It stays a single announcement: edit it once, it changes everywhere.
Two more options live outside the form:
- Newsletter — from a published announcement, Prepare a newsletter campaign creates a draft campaign already filled with the title and body. You review it and send it from the Newsletter module, so nothing goes out by accident. An announcement can only be prepared once.
- Public archive — your page shows the six most recent announcements; the archive keeps all the others reachable, with a search box and a category filter.
If an option is missing from your form, it is simply not part of your current plan. Any value already saved stays in place — it stops being editable and displayed, and comes back if the plan is upgraded again.
7 Where announcements appear
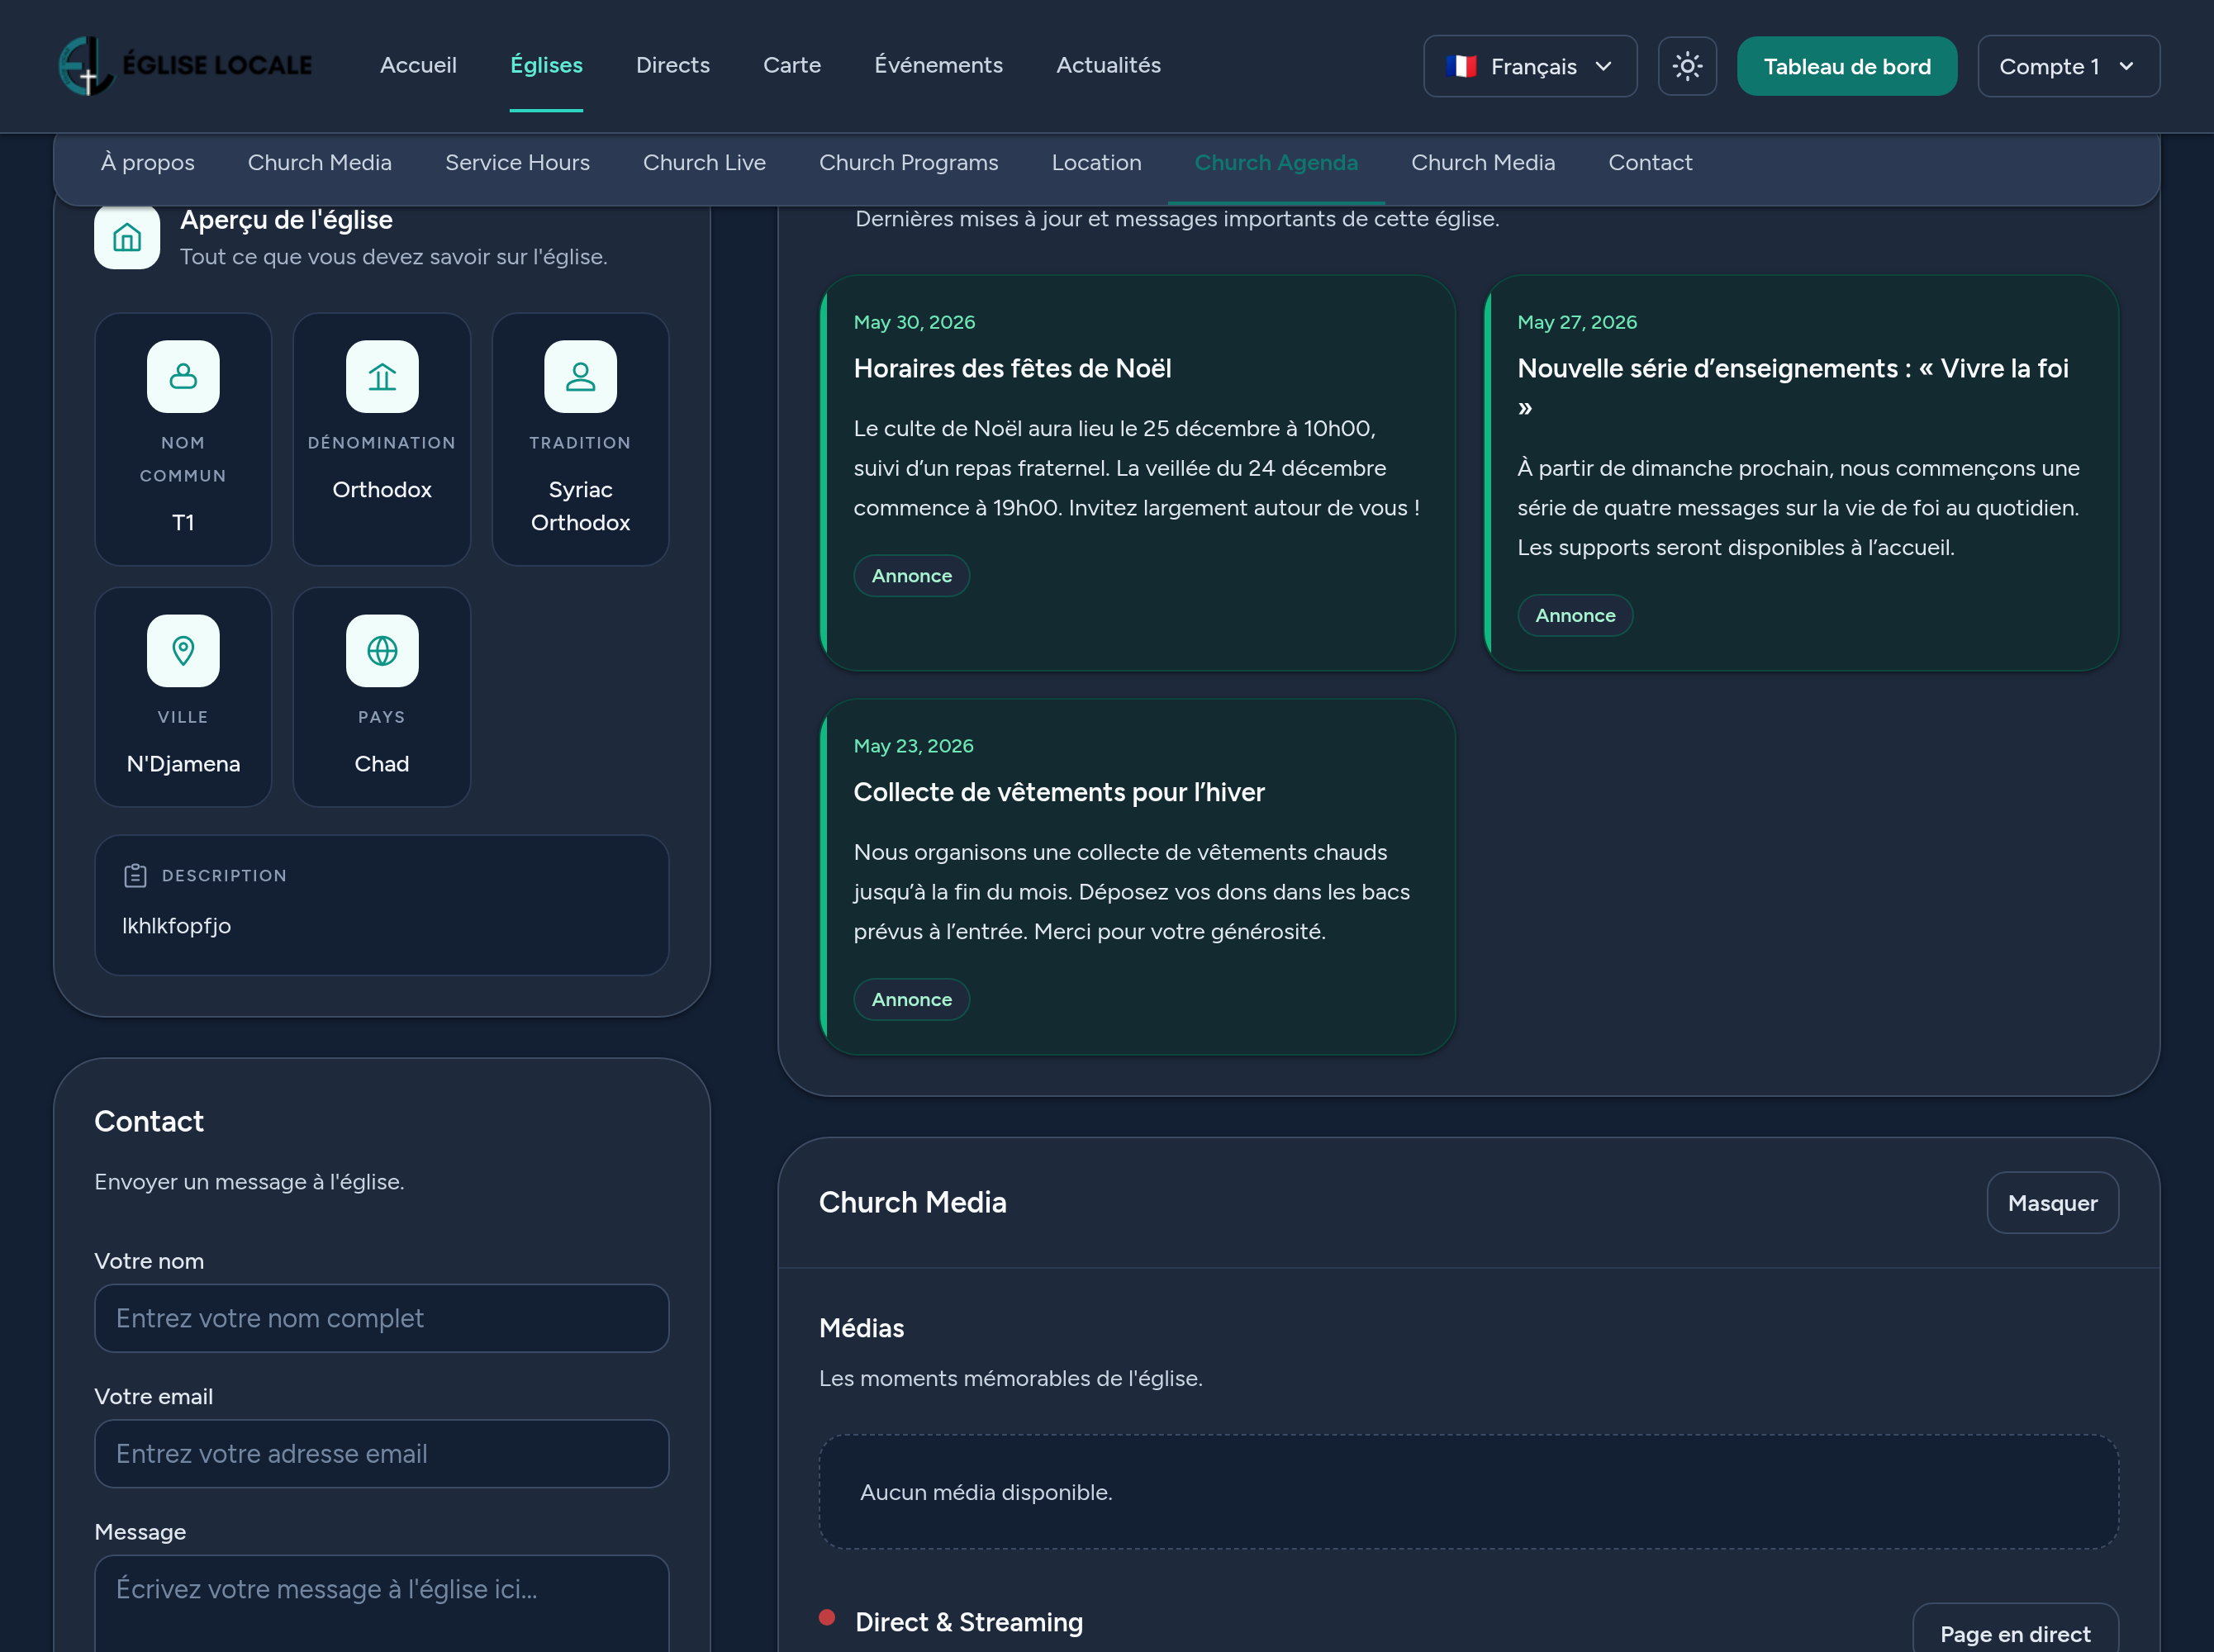
Published announcements whose date has arrived are shown on your public church page, in the Announcements section, newest first. Each visitor sees the announcement in their own language when you have provided a translation, and the default language otherwise.
Pinned announcements come first, and an announcement flagged as an alert banner is also shown across the top of the page. If the public archive is part of your plan, a See all announcements link leads to the full, searchable history.
Drafts, scheduled (future-dated) and expired announcements stay out of the public page — automatically, without any action from you.
8 Tips & good practices
- Keep the title short and clear — it's what members see at a glance.
- Front-load the body — the first lines appear in previews, so put the key information first.
- Translate the important ones — multilingual announcements reach your whole community.
- Use scheduling for time-sensitive notices so they appear exactly when needed.
- Use drafts to prepare announcements in advance and review them before publishing.
- Set an expiry date rather than relying on memory: a dated notice retires itself.
- Keep the alert banner rare — used for everything, it stops being noticed.
- Tidy up — unpublish or delete outdated announcements to keep your page fresh (and free up quota).
That's it — you're ready to keep your community informed with clear, timely announcements.